> ## Documentation Index
> Fetch the complete documentation index at: https://trybloom.co.uk/docs/llms.txt
> Use this file to discover all available pages before exploring further.
# Clients
> The beating heart of your practice - store and manage every client in one place.
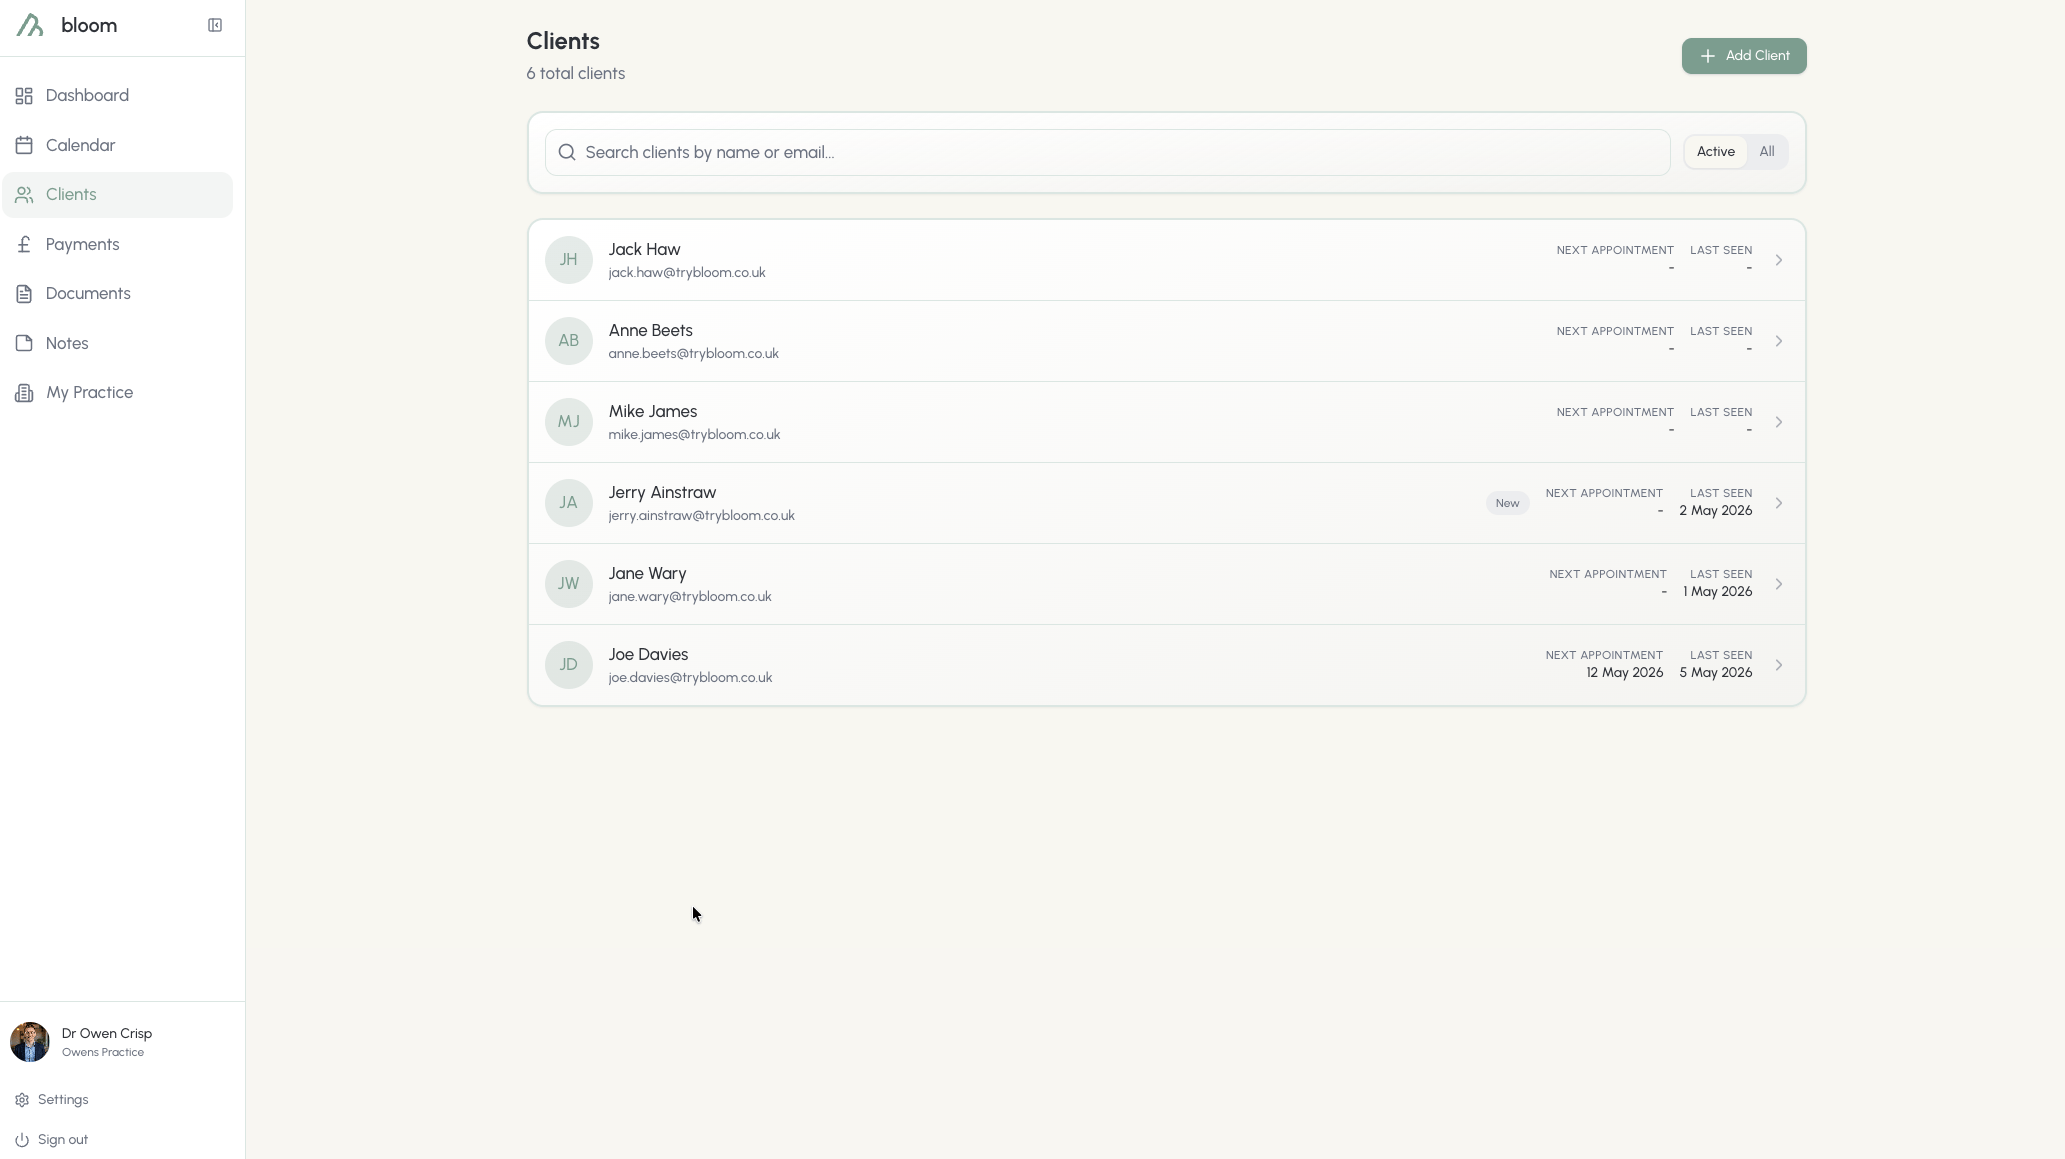
Your client area is the beating heart of your practice. Here, you'll find all you need to know about storing and managing clients here at Bloom. Clients can be easily searched by name or email to quickly access their data.
## Adding a client
On the client's page, adding a new client is done by using the **Add Client** button in the top right of the screen.
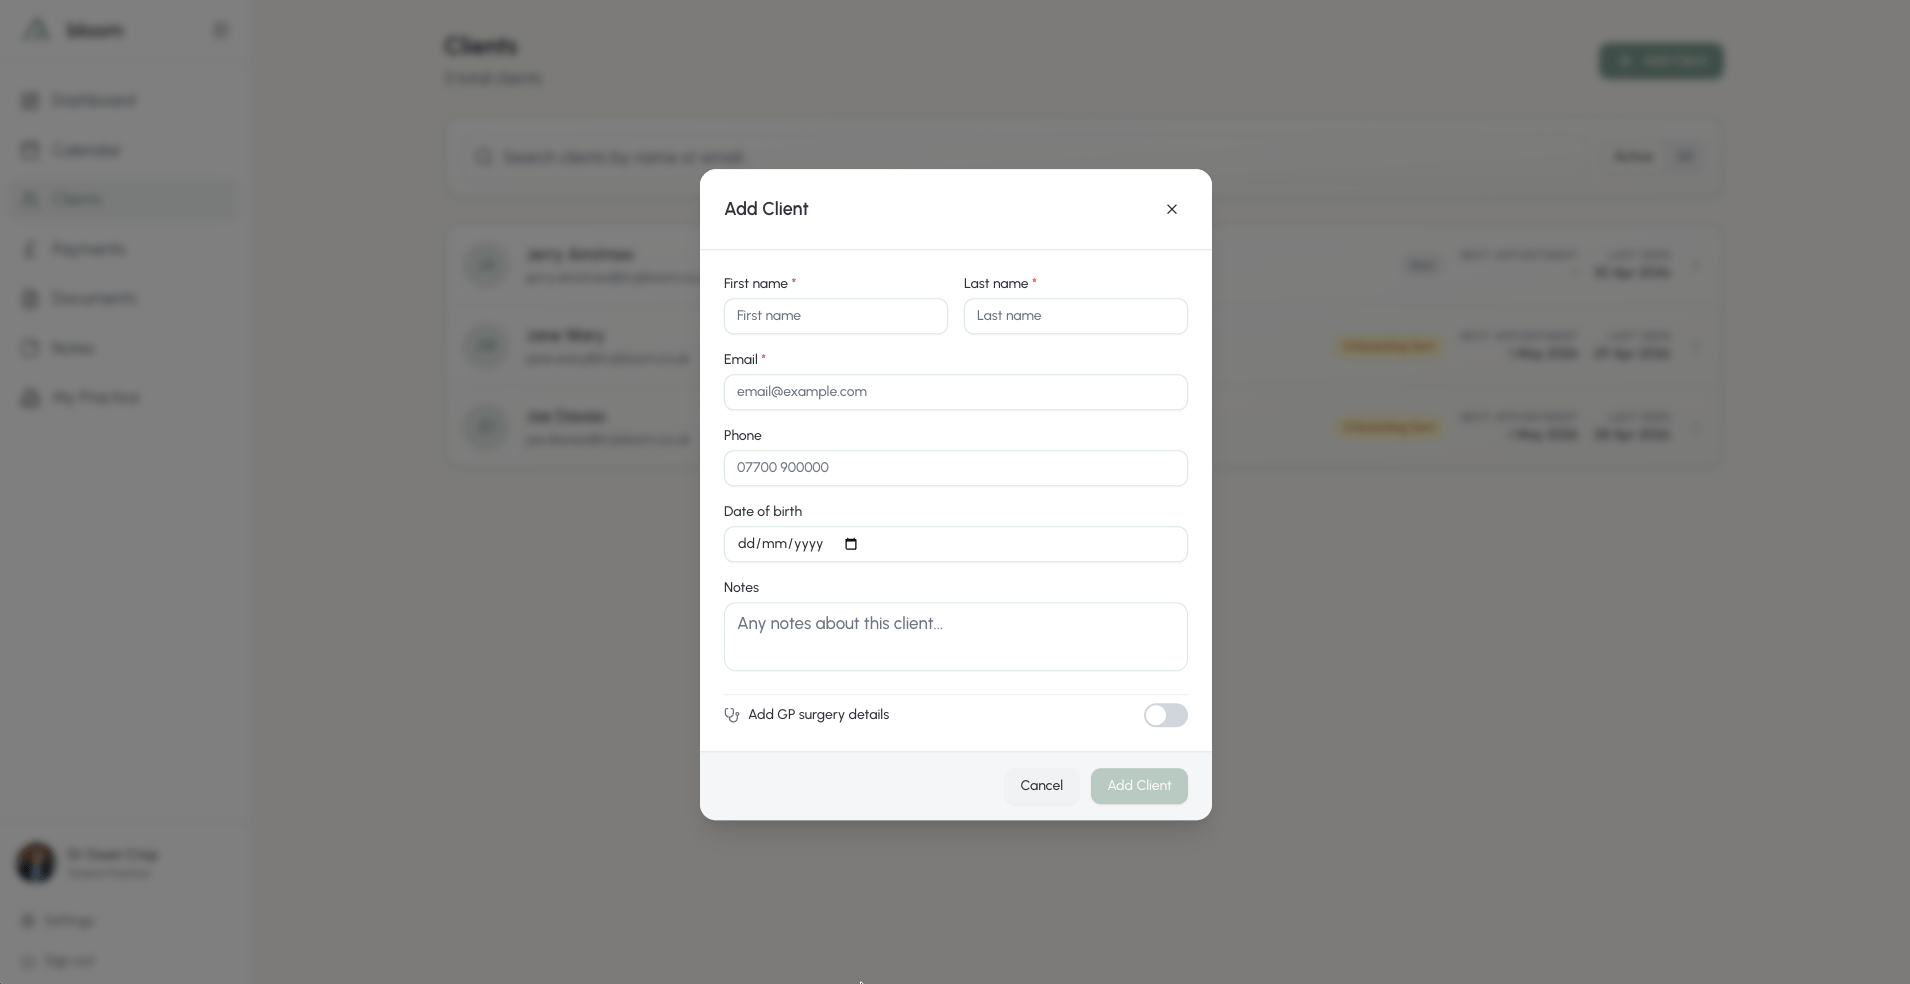 Here, you're able to add:
* First name
* Last name
* Email
* Telephone number
* Date of birth
* Any initial notes you'd like to keep on file in this client's profile. Separate from notes you may add in the future, and only viewable by yourself.
* Payment method - how this client pays, pre-filled from your default (see [Card payments](/docs/card-payments))
* Alternative billing details, if someone other than the client pays for their sessions
* GP surgery and contact details
* Emergency contact details
* An intake form to send with their onboarding - your default form is pre-selected if you've set one (see [Intake forms](/docs/forms))
Name and email are the only required fields in adding a client; all other information is optional but encouraged.
Creating a client automatically enrols them in your onboarding flow - sending out your therapist agreement. By default, Bloom will use our pre-defined contract; if you'd like to use your own, please set this before you add a client.
### Skipping onboarding
Not every client needs the full onboarding flow. If you're bringing an existing caseload into Bloom and your clients have already signed your agreement elsewhere, turn on **Skip onboarding** when adding the client. Bloom won't email them, and they're marked as fully onboarded straight away. If you've chosen an intake form for the client, it's emailed to them as its own link instead of riding the onboarding flow.
Already added the client? Open their profile and choose **Skip onboarding** from the **Actions** menu. Bloom asks you to confirm before making the change:
* No onboarding email is sent, and any previously sent onboarding link stops working.
* The client won't be asked to sign your counselling agreement in Bloom, and any unsigned agreement is removed from their file.
* The client is marked as fully onboarded.
Skipping onboarding means Bloom holds no signed agreement for that client. Keep your own copy on file, or send them a contract from Bloom at any time.
### Billing details
If someone else pays for a client's sessions - a parent, an employer, or an insurer - or your client simply wants payment emails in a separate inbox, turn on **Add alternative billing details** when adding the client (or **Alternative billing details** when editing them). You can set a billing name and a billing email.
Once a billing email is set:
* Payment emails - payment reminders, invoices and receipts - go to the billing email instead of the client.
* Session emails - confirmations, reminders and cancellations - still go to the client's own email.
* If a session is still unpaid the day before, the client receives their usual session reminder while the billing contact receives the invoice.
* Invoices are addressed to the billing name, with the client named beneath.
If you've customised your payment reminder email in **Settings**, the client first name placeholder fills with the billing name on emails sent to the billing contact.
### Payment method
Every client carries their own payment method - card charged before the session, card charged after, payment link, bank transfer, or cash. New clients start on your default from **Settings** → **Card payments** → **How you get paid**; the add-client form pre-fills it so the fast path is zero extra taps.
Change it any time from **Actions** → **Edit details** on the client's profile - it saves together with the rest of their details:
Here, you're able to add:
* First name
* Last name
* Email
* Telephone number
* Date of birth
* Any initial notes you'd like to keep on file in this client's profile. Separate from notes you may add in the future, and only viewable by yourself.
* Payment method - how this client pays, pre-filled from your default (see [Card payments](/docs/card-payments))
* Alternative billing details, if someone other than the client pays for their sessions
* GP surgery and contact details
* Emergency contact details
* An intake form to send with their onboarding - your default form is pre-selected if you've set one (see [Intake forms](/docs/forms))
Name and email are the only required fields in adding a client; all other information is optional but encouraged.
Creating a client automatically enrols them in your onboarding flow - sending out your therapist agreement. By default, Bloom will use our pre-defined contract; if you'd like to use your own, please set this before you add a client.
### Skipping onboarding
Not every client needs the full onboarding flow. If you're bringing an existing caseload into Bloom and your clients have already signed your agreement elsewhere, turn on **Skip onboarding** when adding the client. Bloom won't email them, and they're marked as fully onboarded straight away. If you've chosen an intake form for the client, it's emailed to them as its own link instead of riding the onboarding flow.
Already added the client? Open their profile and choose **Skip onboarding** from the **Actions** menu. Bloom asks you to confirm before making the change:
* No onboarding email is sent, and any previously sent onboarding link stops working.
* The client won't be asked to sign your counselling agreement in Bloom, and any unsigned agreement is removed from their file.
* The client is marked as fully onboarded.
Skipping onboarding means Bloom holds no signed agreement for that client. Keep your own copy on file, or send them a contract from Bloom at any time.
### Billing details
If someone else pays for a client's sessions - a parent, an employer, or an insurer - or your client simply wants payment emails in a separate inbox, turn on **Add alternative billing details** when adding the client (or **Alternative billing details** when editing them). You can set a billing name and a billing email.
Once a billing email is set:
* Payment emails - payment reminders, invoices and receipts - go to the billing email instead of the client.
* Session emails - confirmations, reminders and cancellations - still go to the client's own email.
* If a session is still unpaid the day before, the client receives their usual session reminder while the billing contact receives the invoice.
* Invoices are addressed to the billing name, with the client named beneath.
If you've customised your payment reminder email in **Settings**, the client first name placeholder fills with the billing name on emails sent to the billing contact.
### Payment method
Every client carries their own payment method - card charged before the session, card charged after, payment link, bank transfer, or cash. New clients start on your default from **Settings** → **Card payments** → **How you get paid**; the add-client form pre-fills it so the fast path is zero extra taps.
Change it any time from **Actions** → **Edit details** on the client's profile - it saves together with the rest of their details:
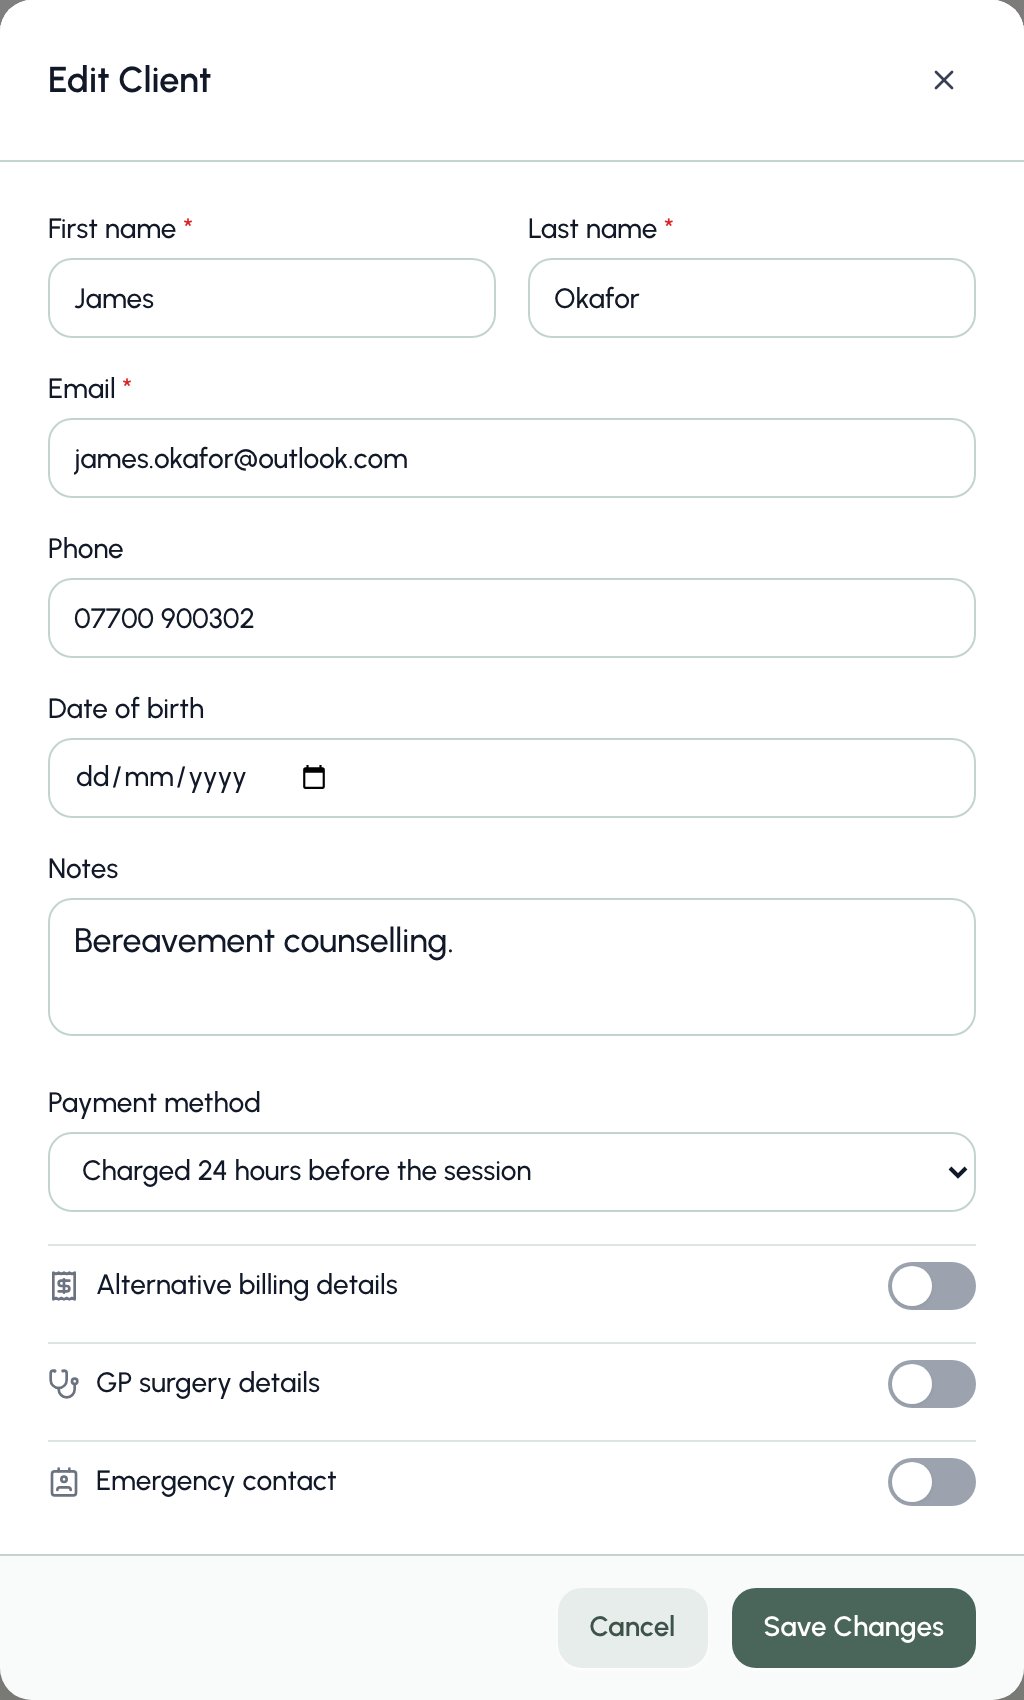 * Moving to a card method emails the client a secure save-card link if they don't have a card on file yet. Until they save one, they receive payment links instead - nothing goes uncollected.
* Moving away from a card method asks whether to keep the saved card on file or remove it from Stripe.
* Need a new card from a client? Choose **Request card details** from the **Actions** menu - the link can be re-sent as often as you like. The action only appears for clients on a card or payment-link method.
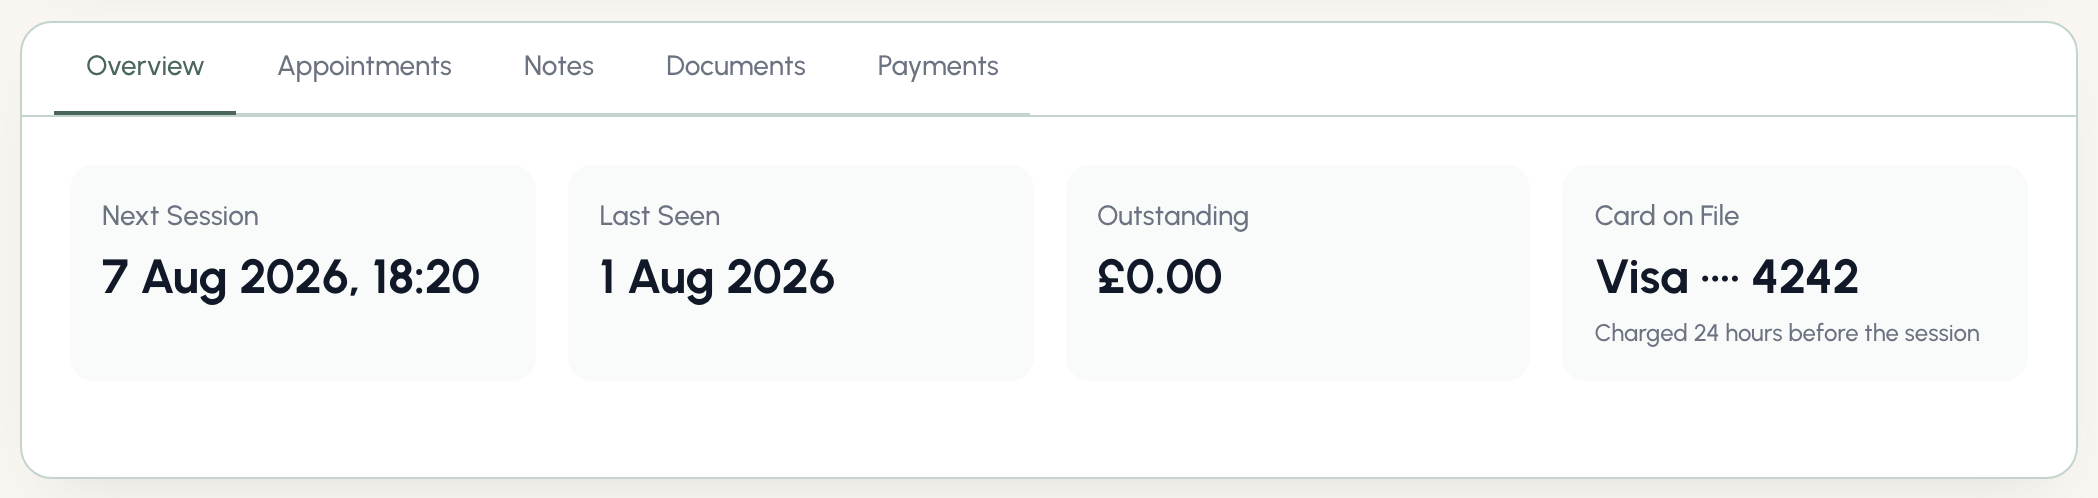
The overview tile keeps the answer at a glance: card clients see their **Card on File** with its charge timing, everyone else sees their **Payment method** - cash, bank transfer, or payment link.
* Moving to a card method emails the client a secure save-card link if they don't have a card on file yet. Until they save one, they receive payment links instead - nothing goes uncollected.
* Moving away from a card method asks whether to keep the saved card on file or remove it from Stripe.
* Need a new card from a client? Choose **Request card details** from the **Actions** menu - the link can be re-sent as often as you like. The action only appears for clients on a card or payment-link method.
The overview tile keeps the answer at a glance: card clients see their **Card on File** with its charge timing, everyone else sees their **Payment method** - cash, bank transfer, or payment link.
 ### Last seen
Last seen allows you to understand when the last time you had a successful appointment with a client.
### Last seen
Last seen allows you to understand when the last time you had a successful appointment with a client.
 ## Active versus All
We understand that clients come and go. A job well done is one where a client leaves with the burden of their troubles lifted from their shoulders.
**Active** clients are all those in your current care, including those in immediate sessions or part of your current client base.
### Removing and deleting a client
Clients who fall under **All** are those who have been removed from your active client base. Their data is archived and stored only for as long as necessary, in accordance with GDPR regulations.
Should a client request removal in accordance with their rights, please contact us to permanently delete their data within a shorter time window.
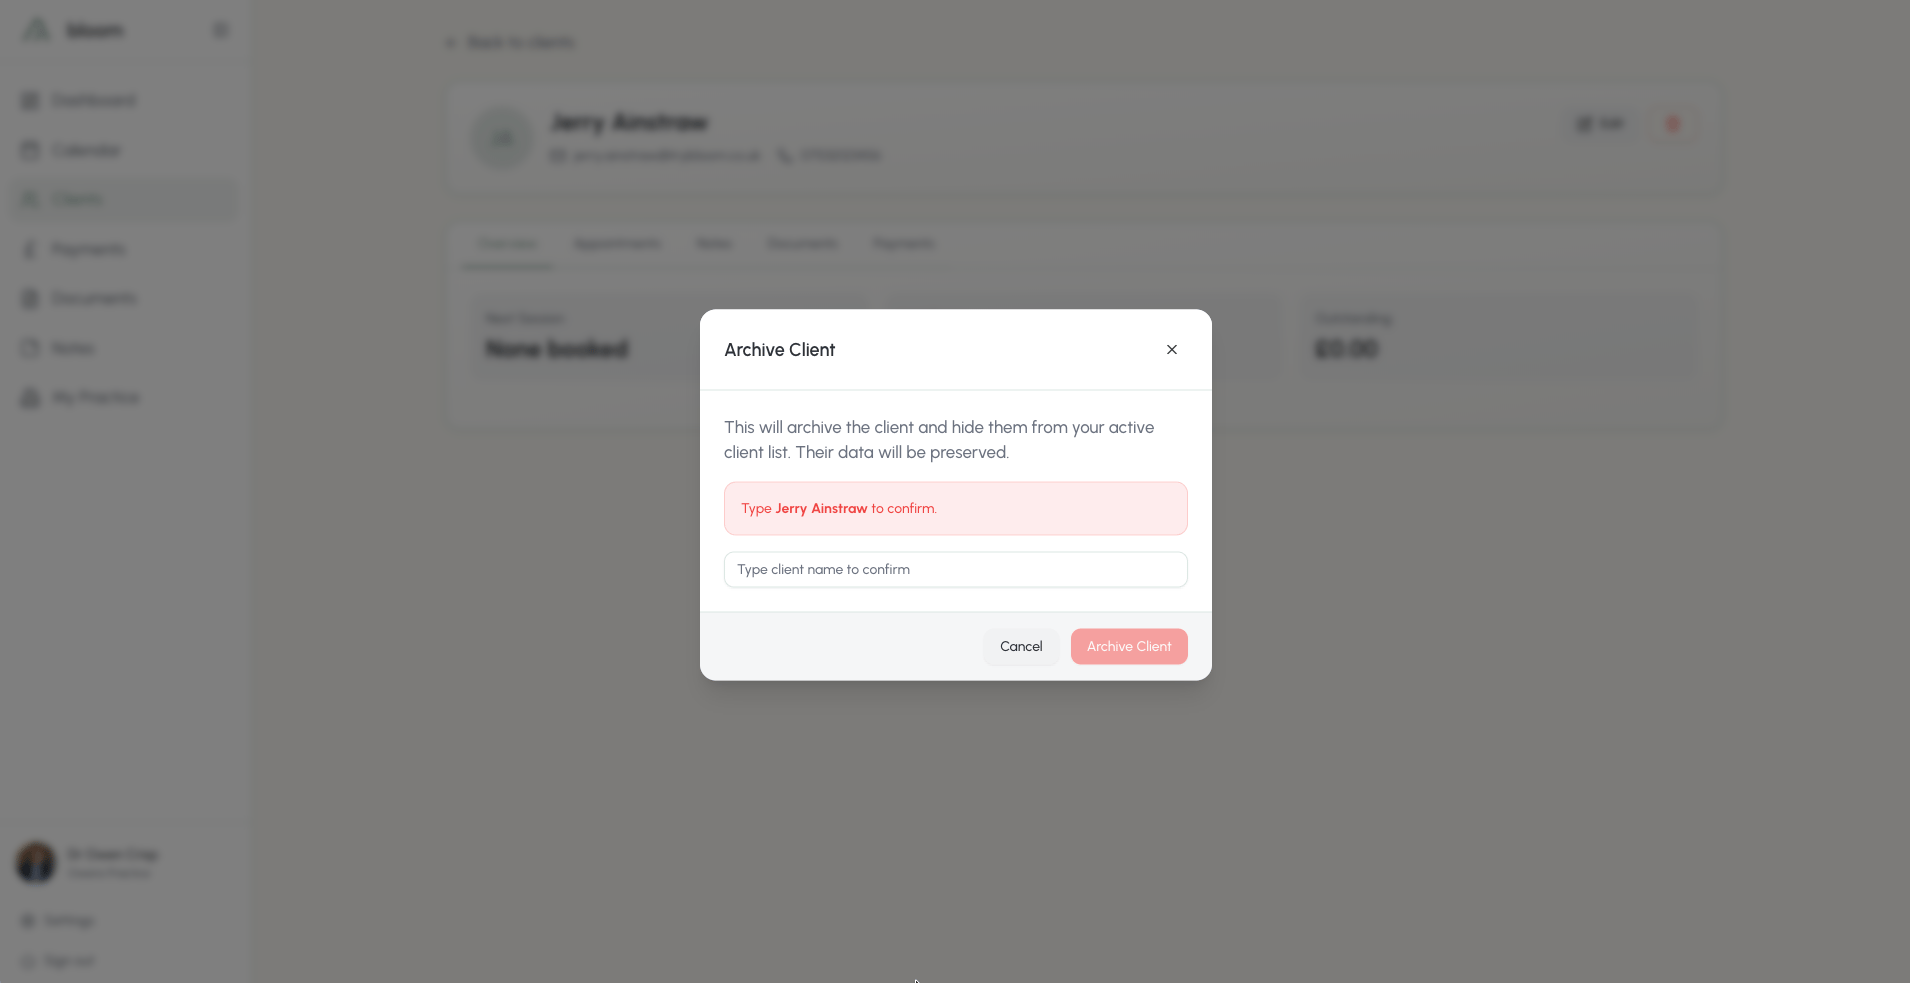
Deleting a client cannot be done without true intent, and cannot be done accidentally. Open an active client and choose **Archive client** from the **Actions** menu - you'll be prompted to enter their full name to confirm your intention. Once this is completed, the client will be removed from your active client roster and archived.
## Active versus All
We understand that clients come and go. A job well done is one where a client leaves with the burden of their troubles lifted from their shoulders.
**Active** clients are all those in your current care, including those in immediate sessions or part of your current client base.
### Removing and deleting a client
Clients who fall under **All** are those who have been removed from your active client base. Their data is archived and stored only for as long as necessary, in accordance with GDPR regulations.
Should a client request removal in accordance with their rights, please contact us to permanently delete their data within a shorter time window.
Deleting a client cannot be done without true intent, and cannot be done accidentally. Open an active client and choose **Archive client** from the **Actions** menu - you'll be prompted to enter their full name to confirm your intention. Once this is completed, the client will be removed from your active client roster and archived.
 ### Unarchiving a client
In the unlikely case you find yourself accidentally archiving a client, or in need of restoring the data of a recently removed client - it can be done easily by clicking the restore arrow next to their name, in the **All** section:
### Unarchiving a client
In the unlikely case you find yourself accidentally archiving a client, or in need of restoring the data of a recently removed client - it can be done easily by clicking the restore arrow next to their name, in the **All** section:
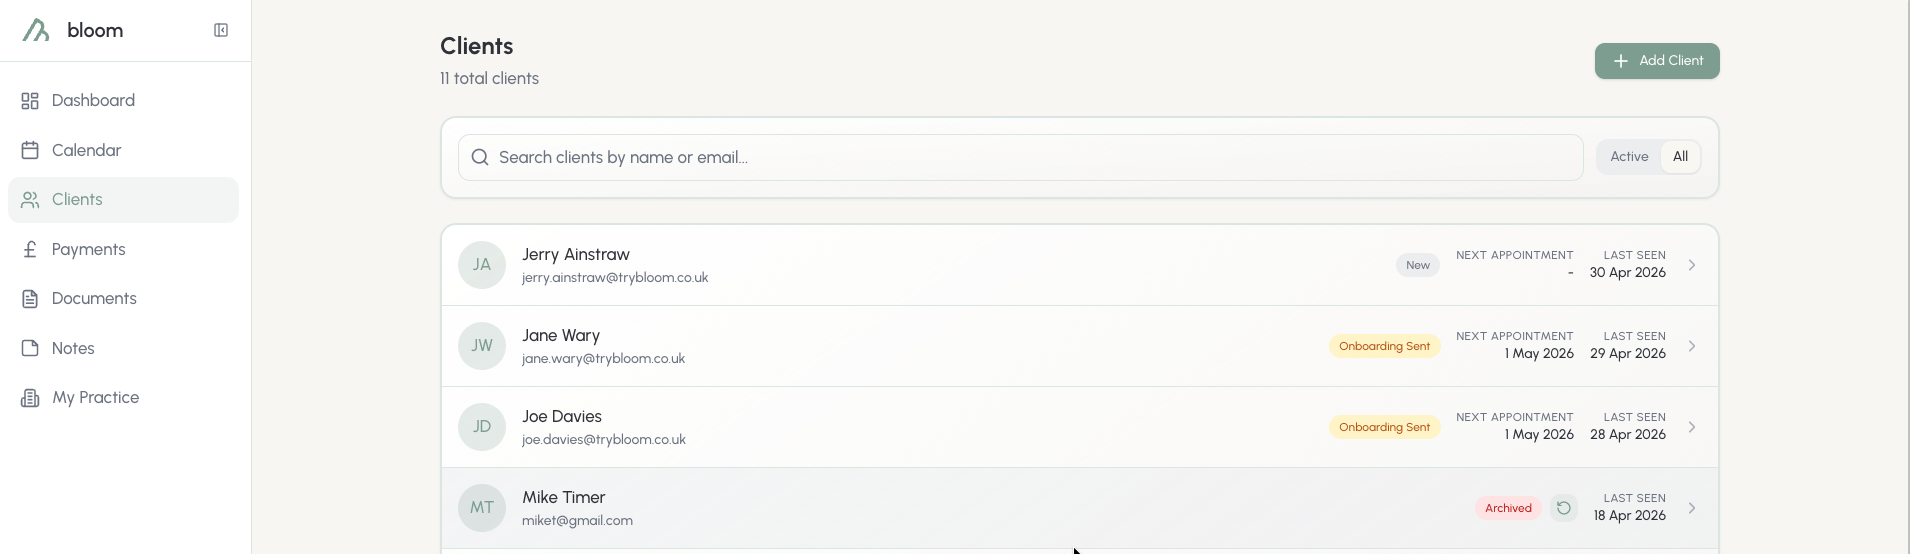 This will restore the client to your active client list.
## Client overview
To go deeper, each client you have will come with their own client overview. While most of their data is reachable from other avenues (such as notes from the calendar), the client overview can be thought of as the "hub" of each individual. Here, you'll see:
* Appointments, past and present
* Session notes
* Documents the client has been sent, or signed
* Payments, paid or unpaid
### Client appointments and notes
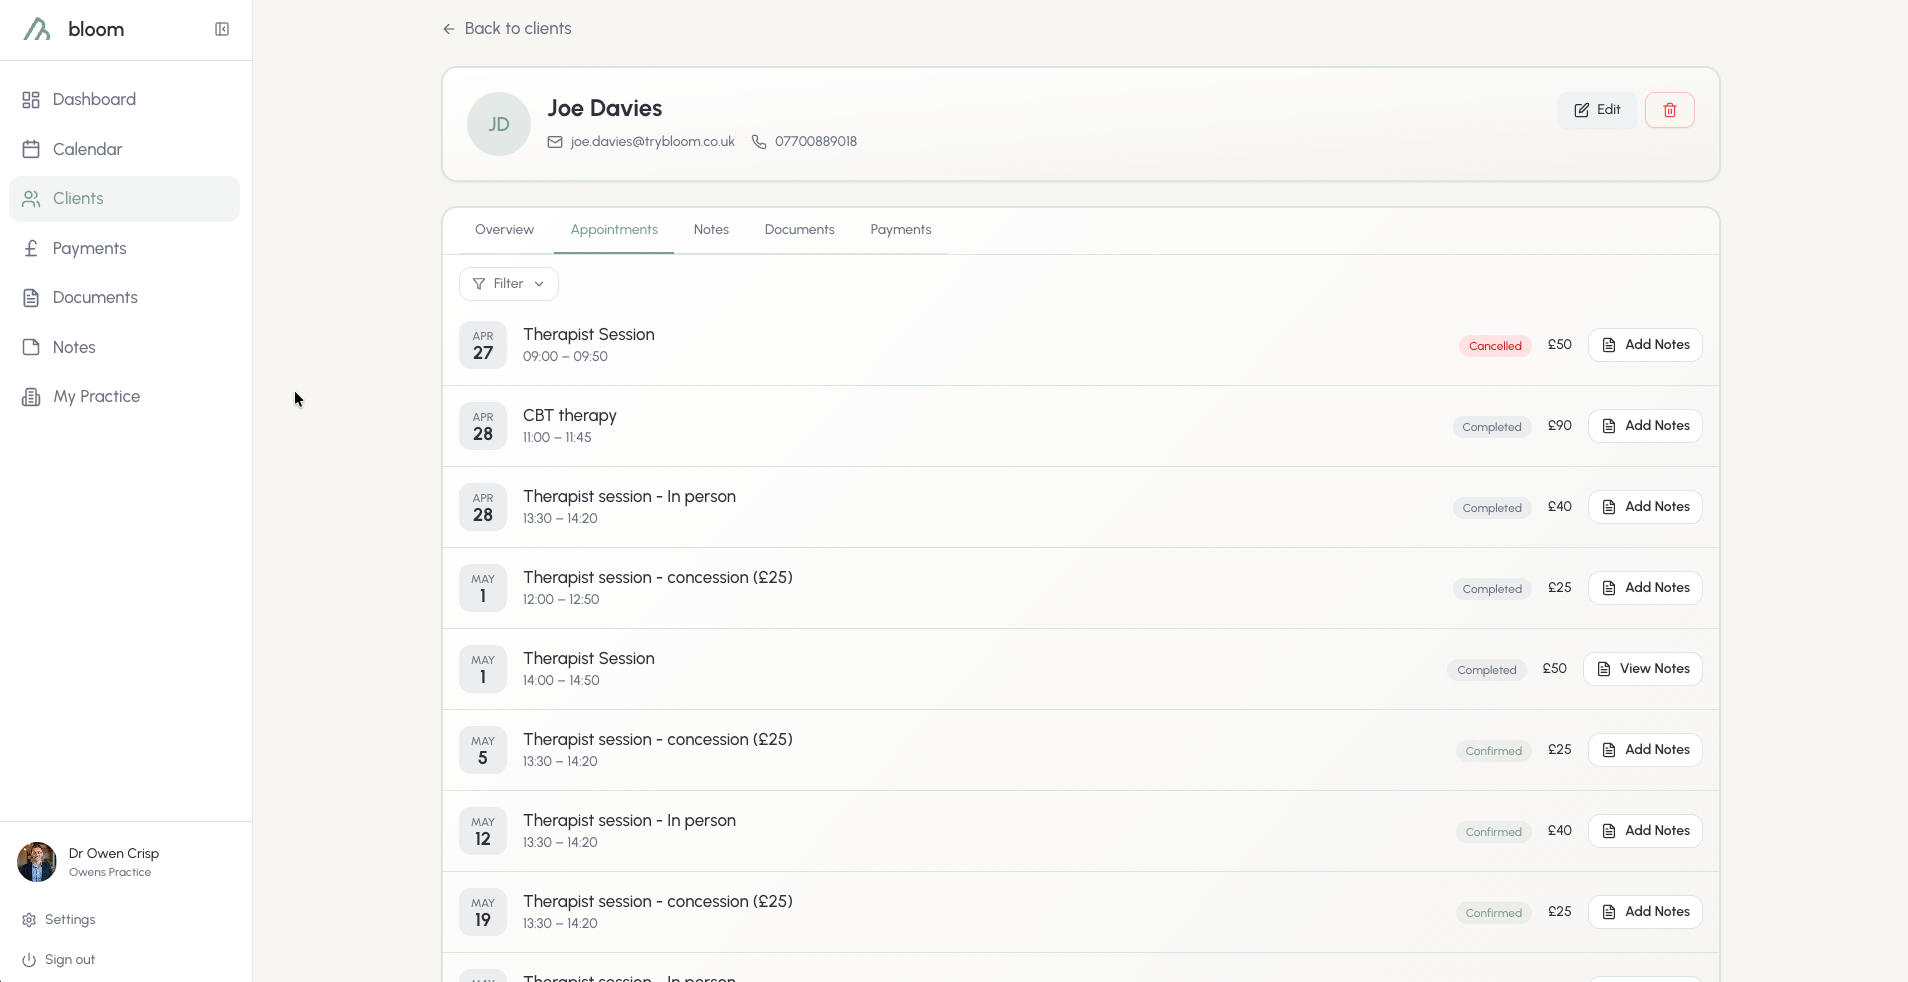
Here you'll find all appointments, past and present, along with their fees. If notes have been added, they're available to view here. Notes that were already submitted for the session can be easily edited and pinned in this view. Pinning session notes here keeps them at the top of the client's notes list, so you can pin the most important batch without searching.
If you've not been able to complete notes during the session, notes can easily be tied to the session by clicking **add notes**.
This will restore the client to your active client list.
## Client overview
To go deeper, each client you have will come with their own client overview. While most of their data is reachable from other avenues (such as notes from the calendar), the client overview can be thought of as the "hub" of each individual. Here, you'll see:
* Appointments, past and present
* Session notes
* Documents the client has been sent, or signed
* Payments, paid or unpaid
### Client appointments and notes
Here you'll find all appointments, past and present, along with their fees. If notes have been added, they're available to view here. Notes that were already submitted for the session can be easily edited and pinned in this view. Pinning session notes here keeps them at the top of the client's notes list, so you can pin the most important batch without searching.
If you've not been able to complete notes during the session, notes can easily be tied to the session by clicking **add notes**.
 ### Client documents
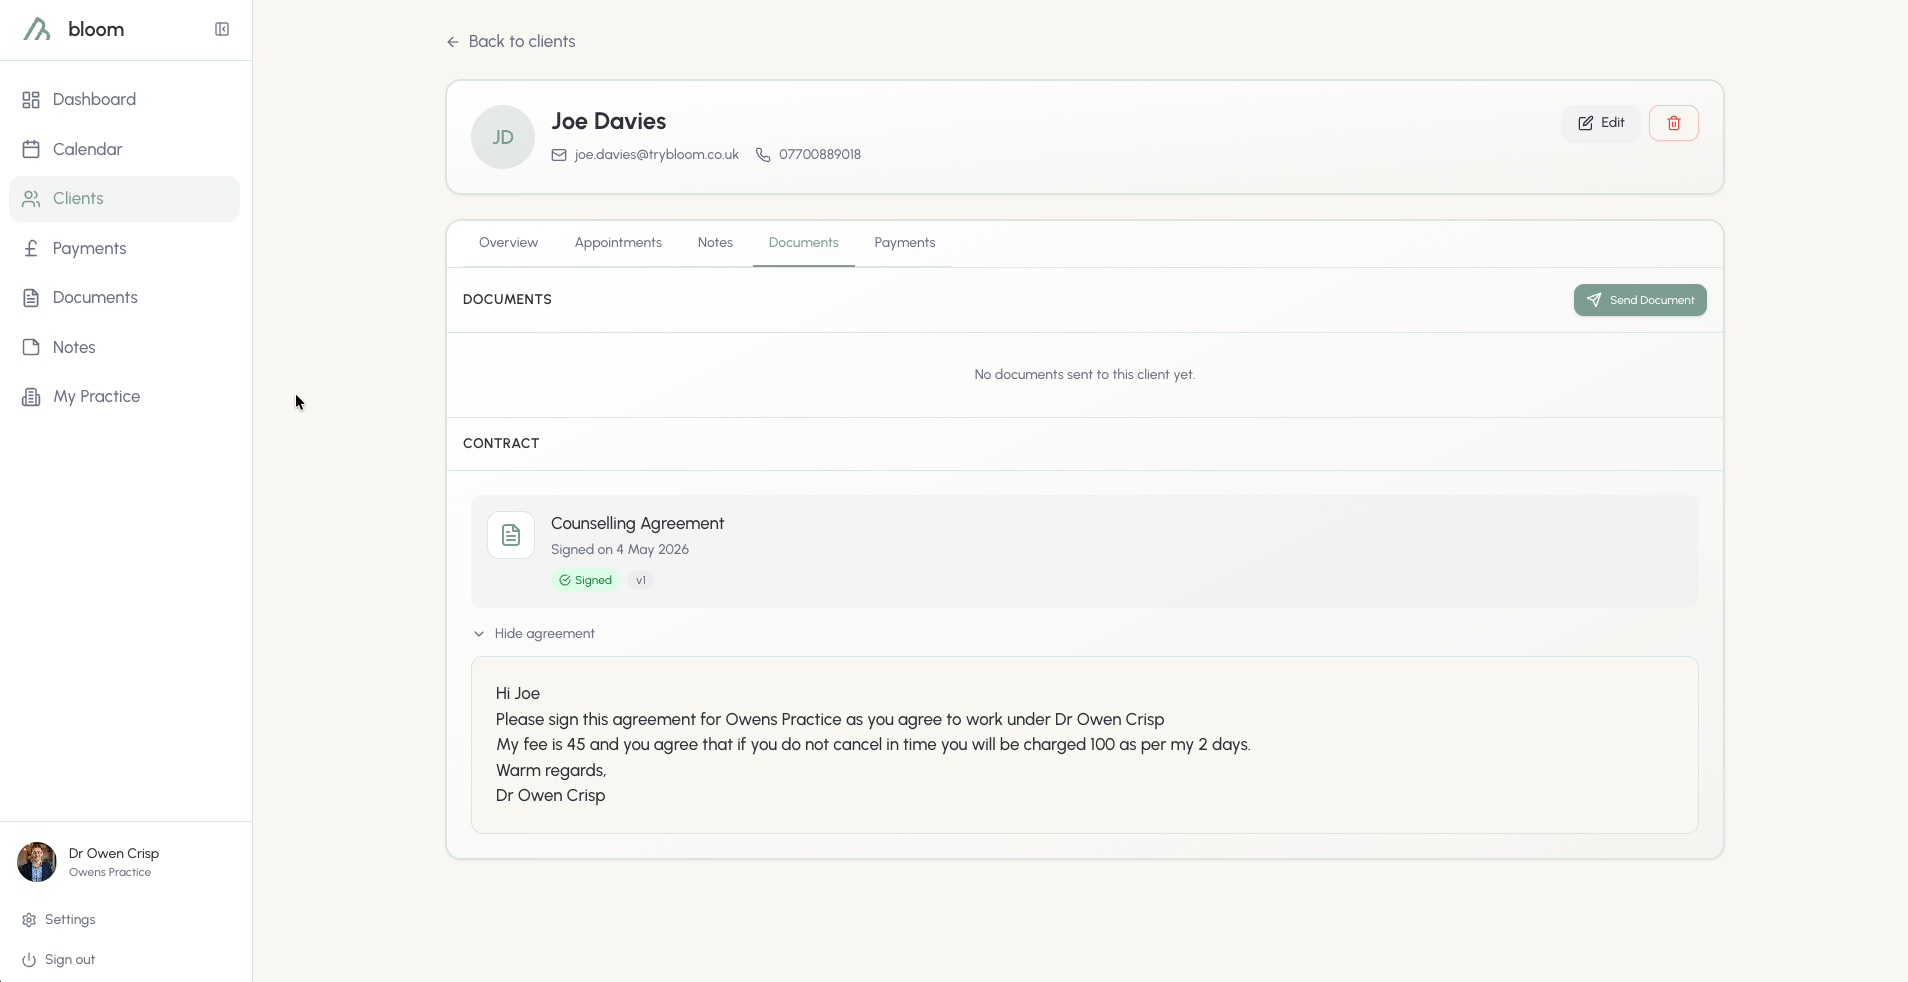
Individual client documents are stored for each client, allowing you to see everything sent or signed by each client in one place. Most importantly, you'll find the patient agreement signed during their onboarding.
### Client documents
Individual client documents are stored for each client, allowing you to see everything sent or signed by each client in one place. Most importantly, you'll find the patient agreement signed during their onboarding.
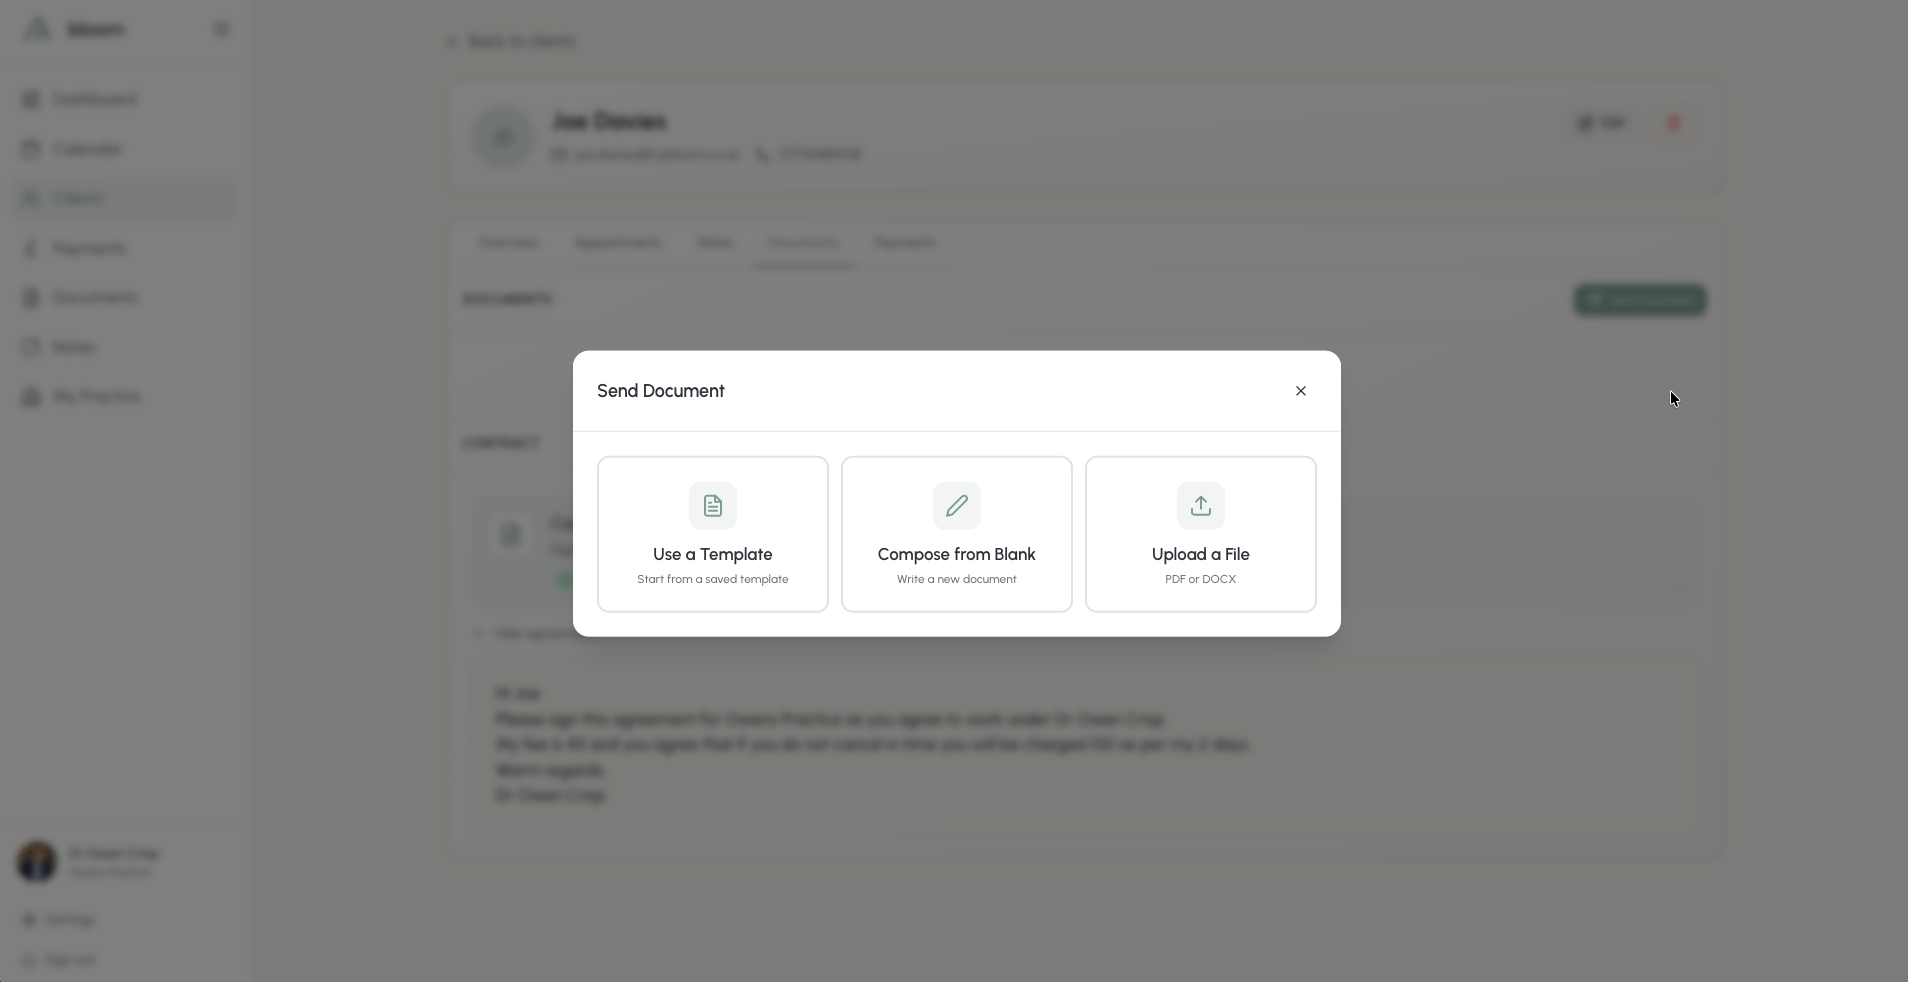
 This space can also be used to send documents to clients, from a variety of methods. Bloom comes pre-loaded with templates, or write your own.
 ### Client payments
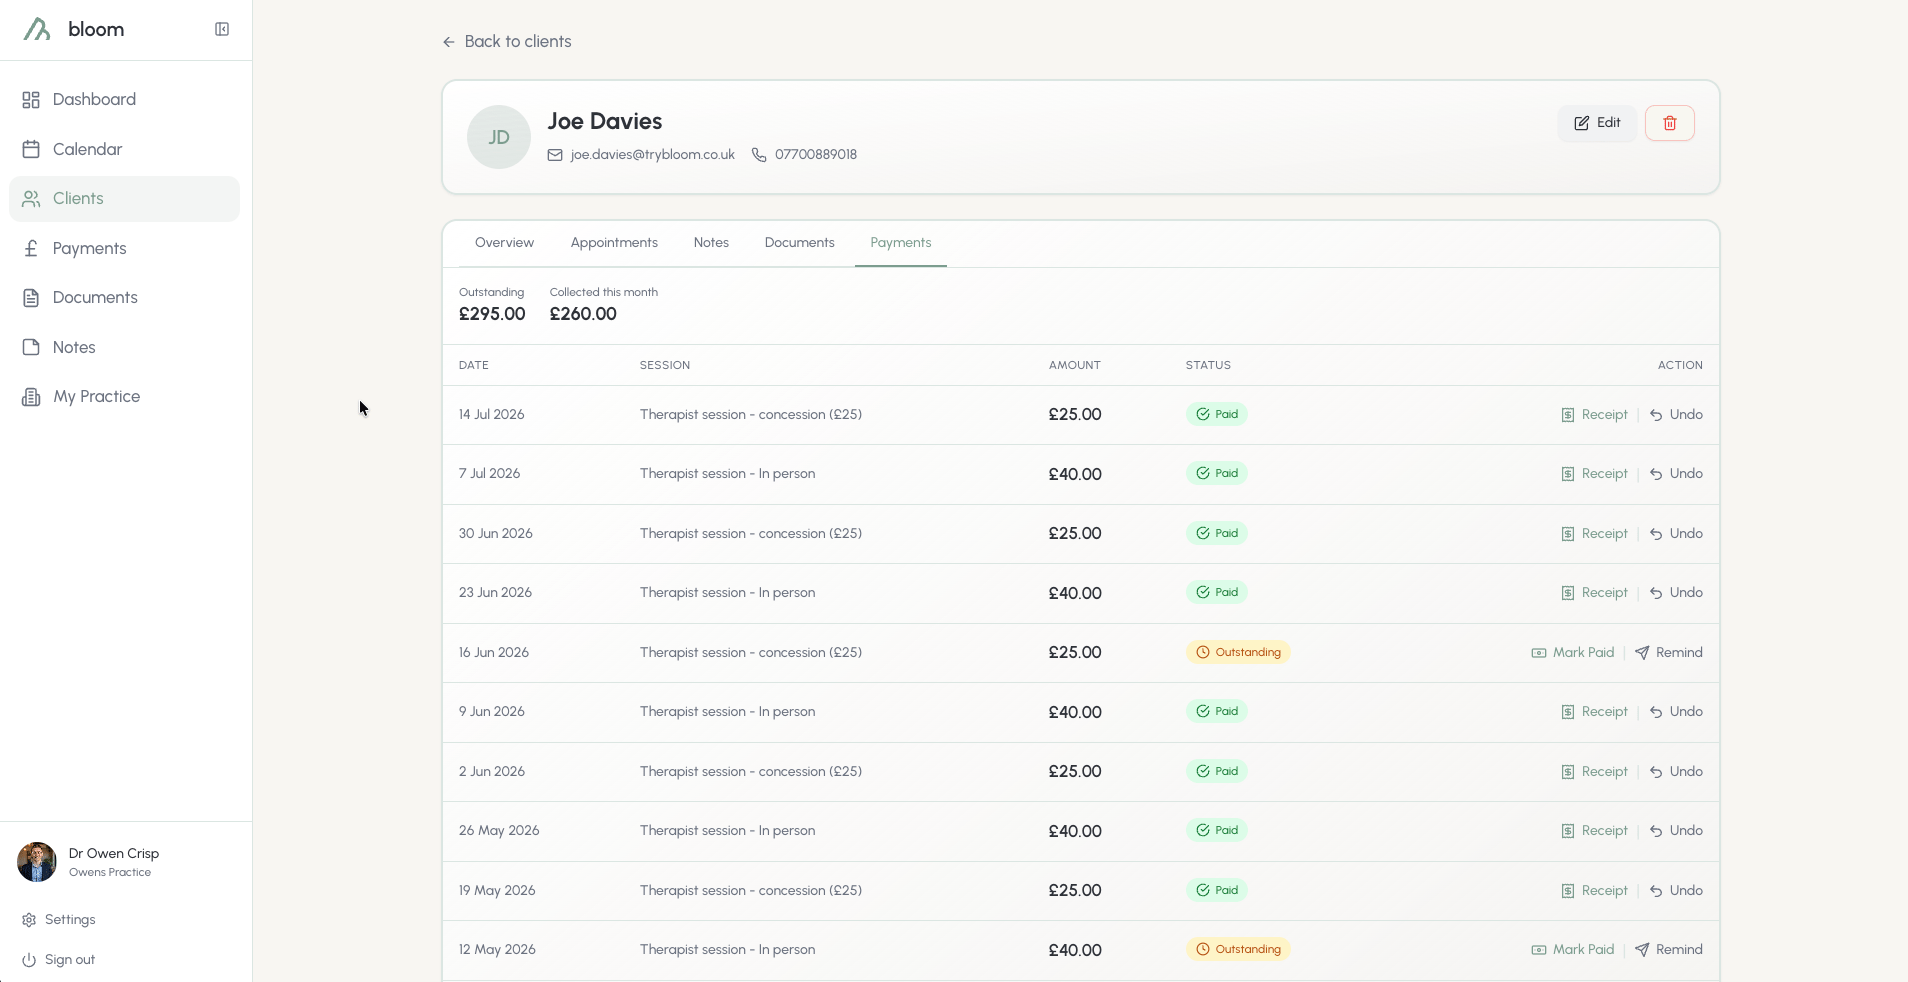
The payments tab gives you an auditable trail of what is, and what might not yet be, paid. Although issued directly post-payment, receipts can also be resent directly from the client payment tab. If the client has billing details set, payment reminders and receipts go to their billing contact rather than the client.
A **Method** column shows how each session was - or will be - paid: **Card (Stripe)**, **Cash**, or **Bank Transfer**. For clients on a card or payment-link method you'll also see Bloom's collection at work here - **Auto-charge scheduled**, **Payment link sent**, **Charge failed** (with a one-click retry), and **Refunded**. The full list of statuses lives on the [Payments page guide](/docs/payments#payment-statuses).
If you decide not to charge for a session, click **Waive** on the outstanding payment. The session stops counting towards your outstanding total and payment reminders stop. You can optionally email the client to let them know nothing is due, and add a private note only you can see. Changed your mind? Click **Reinstate** to make the fee outstanding again.
### Client payments
The payments tab gives you an auditable trail of what is, and what might not yet be, paid. Although issued directly post-payment, receipts can also be resent directly from the client payment tab. If the client has billing details set, payment reminders and receipts go to their billing contact rather than the client.
A **Method** column shows how each session was - or will be - paid: **Card (Stripe)**, **Cash**, or **Bank Transfer**. For clients on a card or payment-link method you'll also see Bloom's collection at work here - **Auto-charge scheduled**, **Payment link sent**, **Charge failed** (with a one-click retry), and **Refunded**. The full list of statuses lives on the [Payments page guide](/docs/payments#payment-statuses).
If you decide not to charge for a session, click **Waive** on the outstanding payment. The session stops counting towards your outstanding total and payment reminders stop. You can optionally email the client to let them know nothing is due, and add a private note only you can see. Changed your mind? Click **Reinstate** to make the fee outstanding again.