

Prerequisites
Before you connect Zoom to Bloom, make sure you have:- An active Bloom account (any paid plan).
- A Zoom account. Free accounts work for short sessions; longer sessions need a paid Zoom plan.
- Permission to authorise third-party apps on your Zoom account. Some practice-managed Zoom accounts restrict this - check with your Zoom admin if the authorisation screen blocks you.
Sign up for Zoom
Create a free Zoom account to get started.
Adding the app
Zoom lets you make calls in a browser or through its dedicated application. To connect your account to Bloom, you’ll need to visit settings, then integrations:Bloom integrations
Open your Bloom settings to manage integrations.
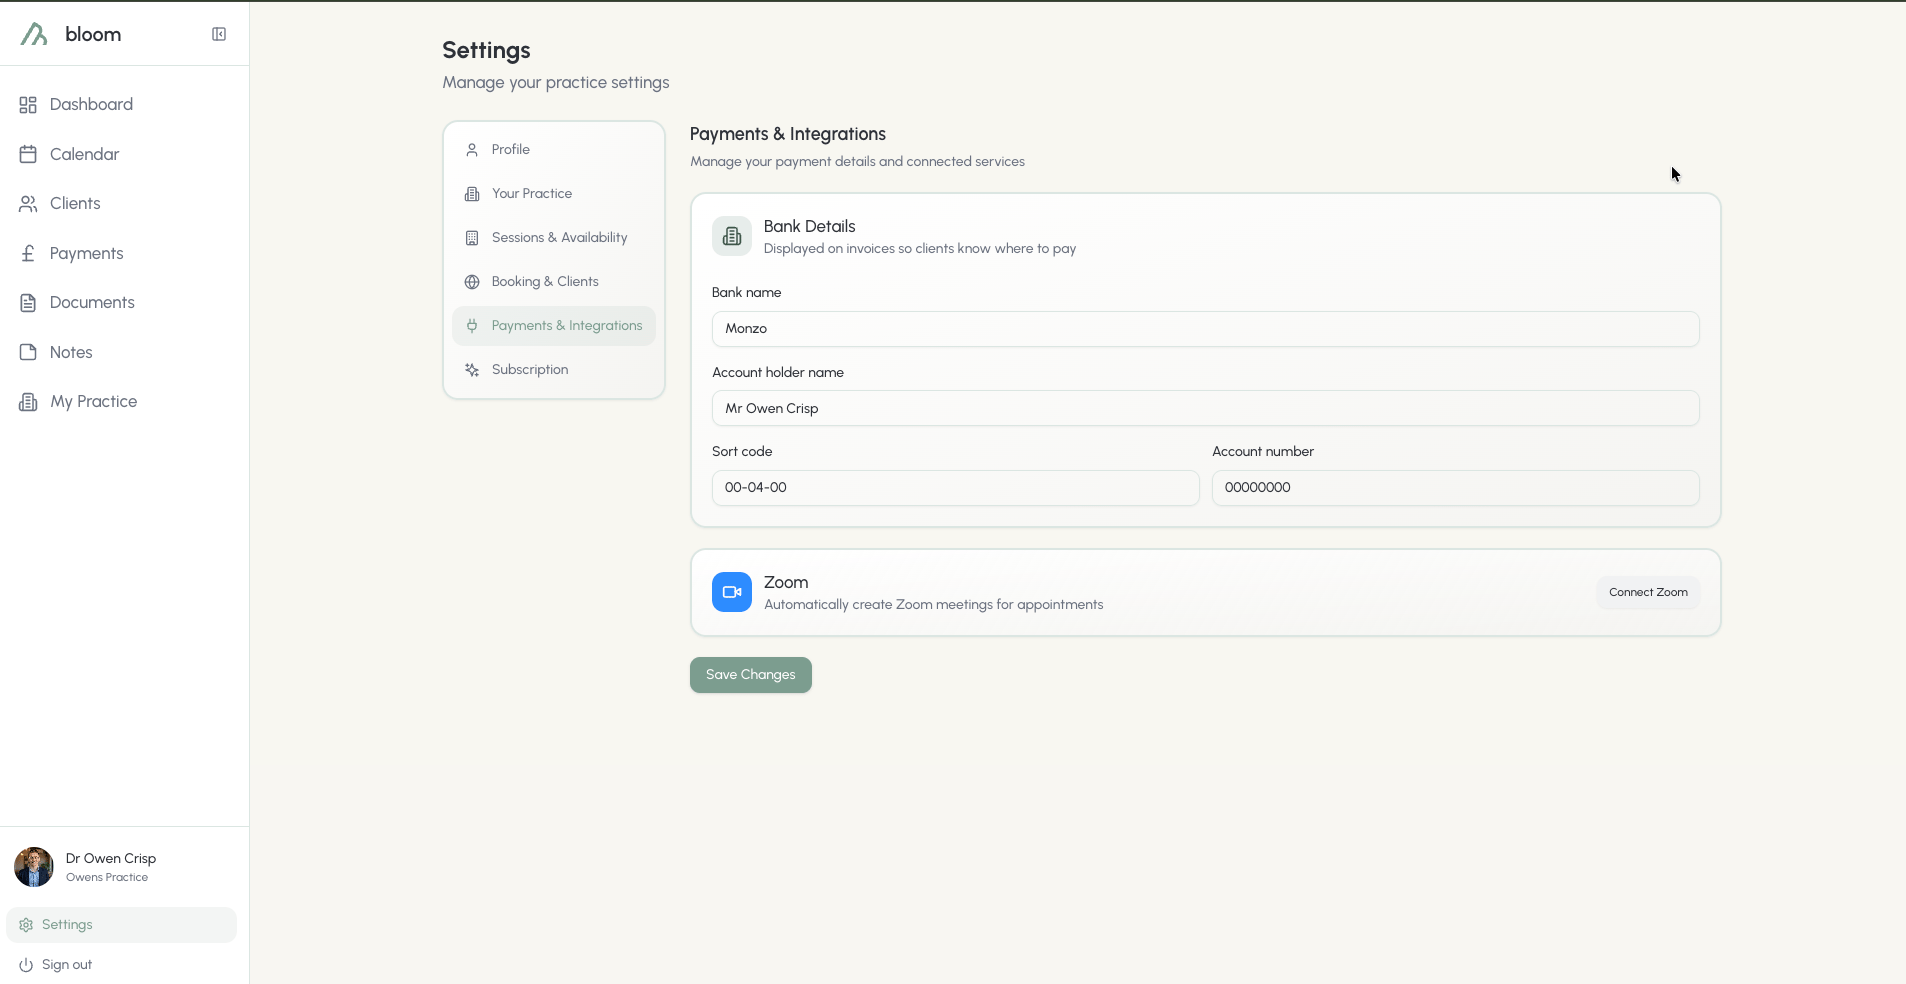
- Sign in to Bloom and open Settings → Integrations.
- Click Connect Zoom. You’ll be redirected to Zoom’s authorisation screen.
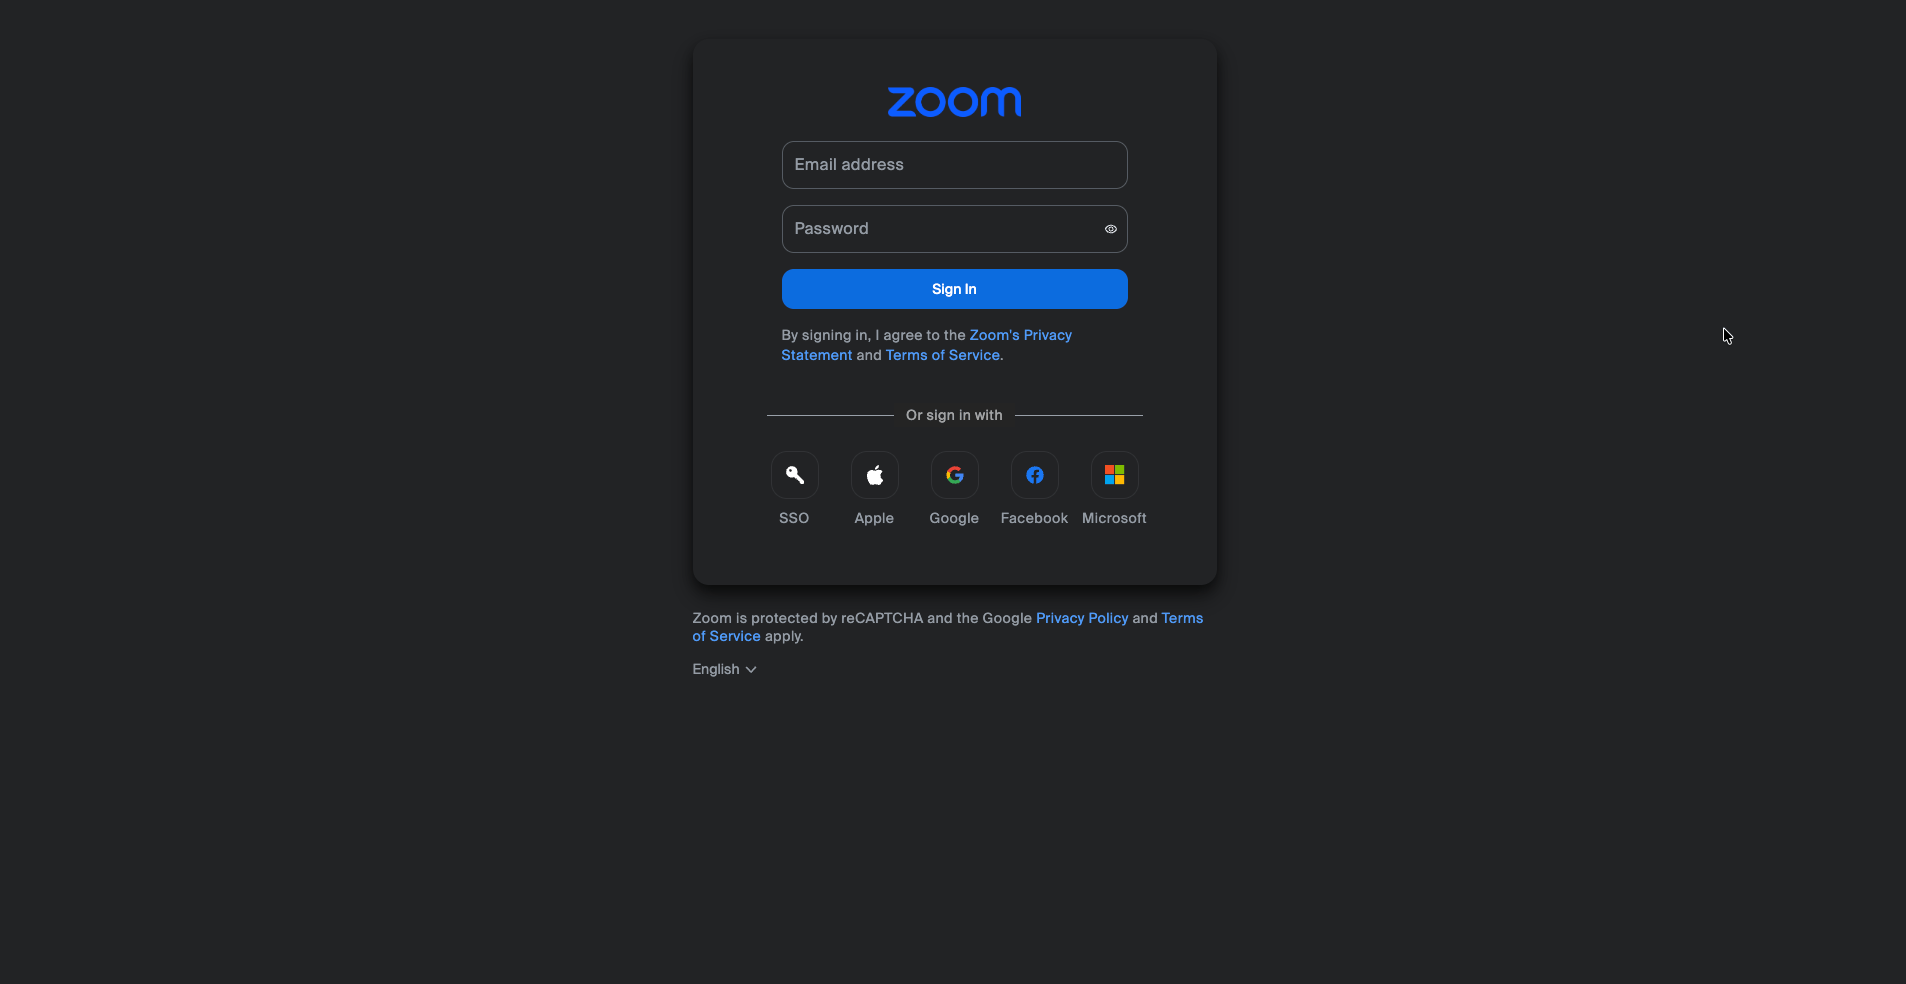
- Sign in to Zoom (if you aren’t already) and review the requested permissions.
- Click Allow to authorise Bloom.
- You’ll be redirected back to the Bloom integrations page with a connection successful message.
Installing from the Zoom App Marketplace
You can also add Bloom directly from the Zoom App Marketplace listing instead of starting inside Bloom. Both paths end in the same place and produce the same connection.- Sign in to your Zoom account at zoom.us.
- Open the Bloom listing on the Zoom App Marketplace (search for “Bloom”).
- Click Add.
- Review the requested permissions and click Allow to authorise Bloom.
- You’ll be redirected to Bloom. Sign in to your Bloom account if prompted, and you’ll land on the integrations page with a connection successful message.
You need an active Bloom account to finish the connection. If you don’t have one yet, you’ll be prompted to sign up before the Zoom connection is saved.
Permissions Bloom requests
When you authorise Bloom, Zoom will show you the scopes Bloom needs. We only ask for what’s required to schedule and manage your client calls:
Bloom does not request access to your recordings, cloud storage, chat, or contacts.
Practices with multiple seats
Using the integration
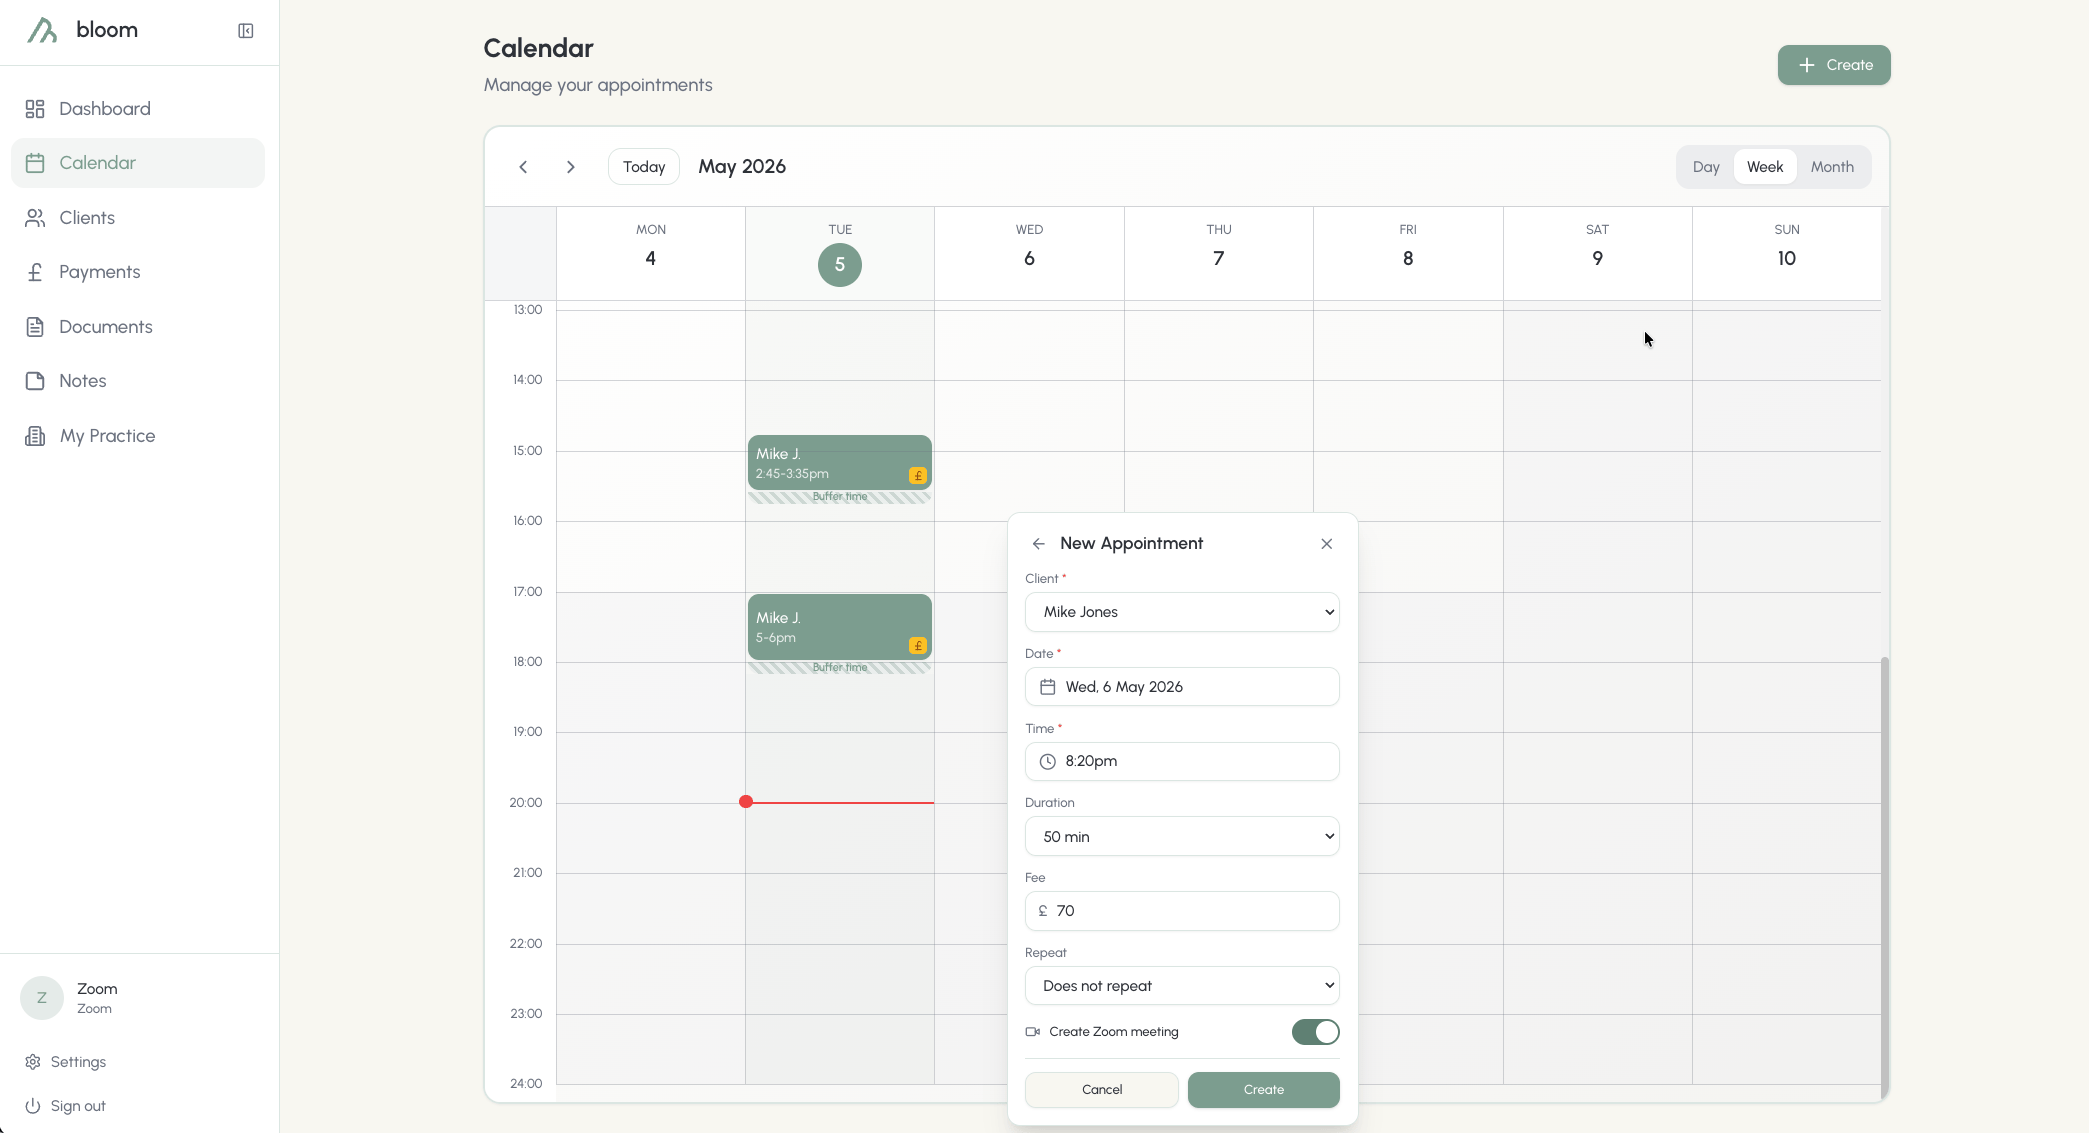
Scheduling a Zoom call
Use case: automatically attach a Zoom meeting to a new client appointment in Bloom. Prerequisites:- Your Zoom account is connected (see Adding the app).
- You’re creating or editing an appointment in the Bloom calendar.
Joining a Zoom call
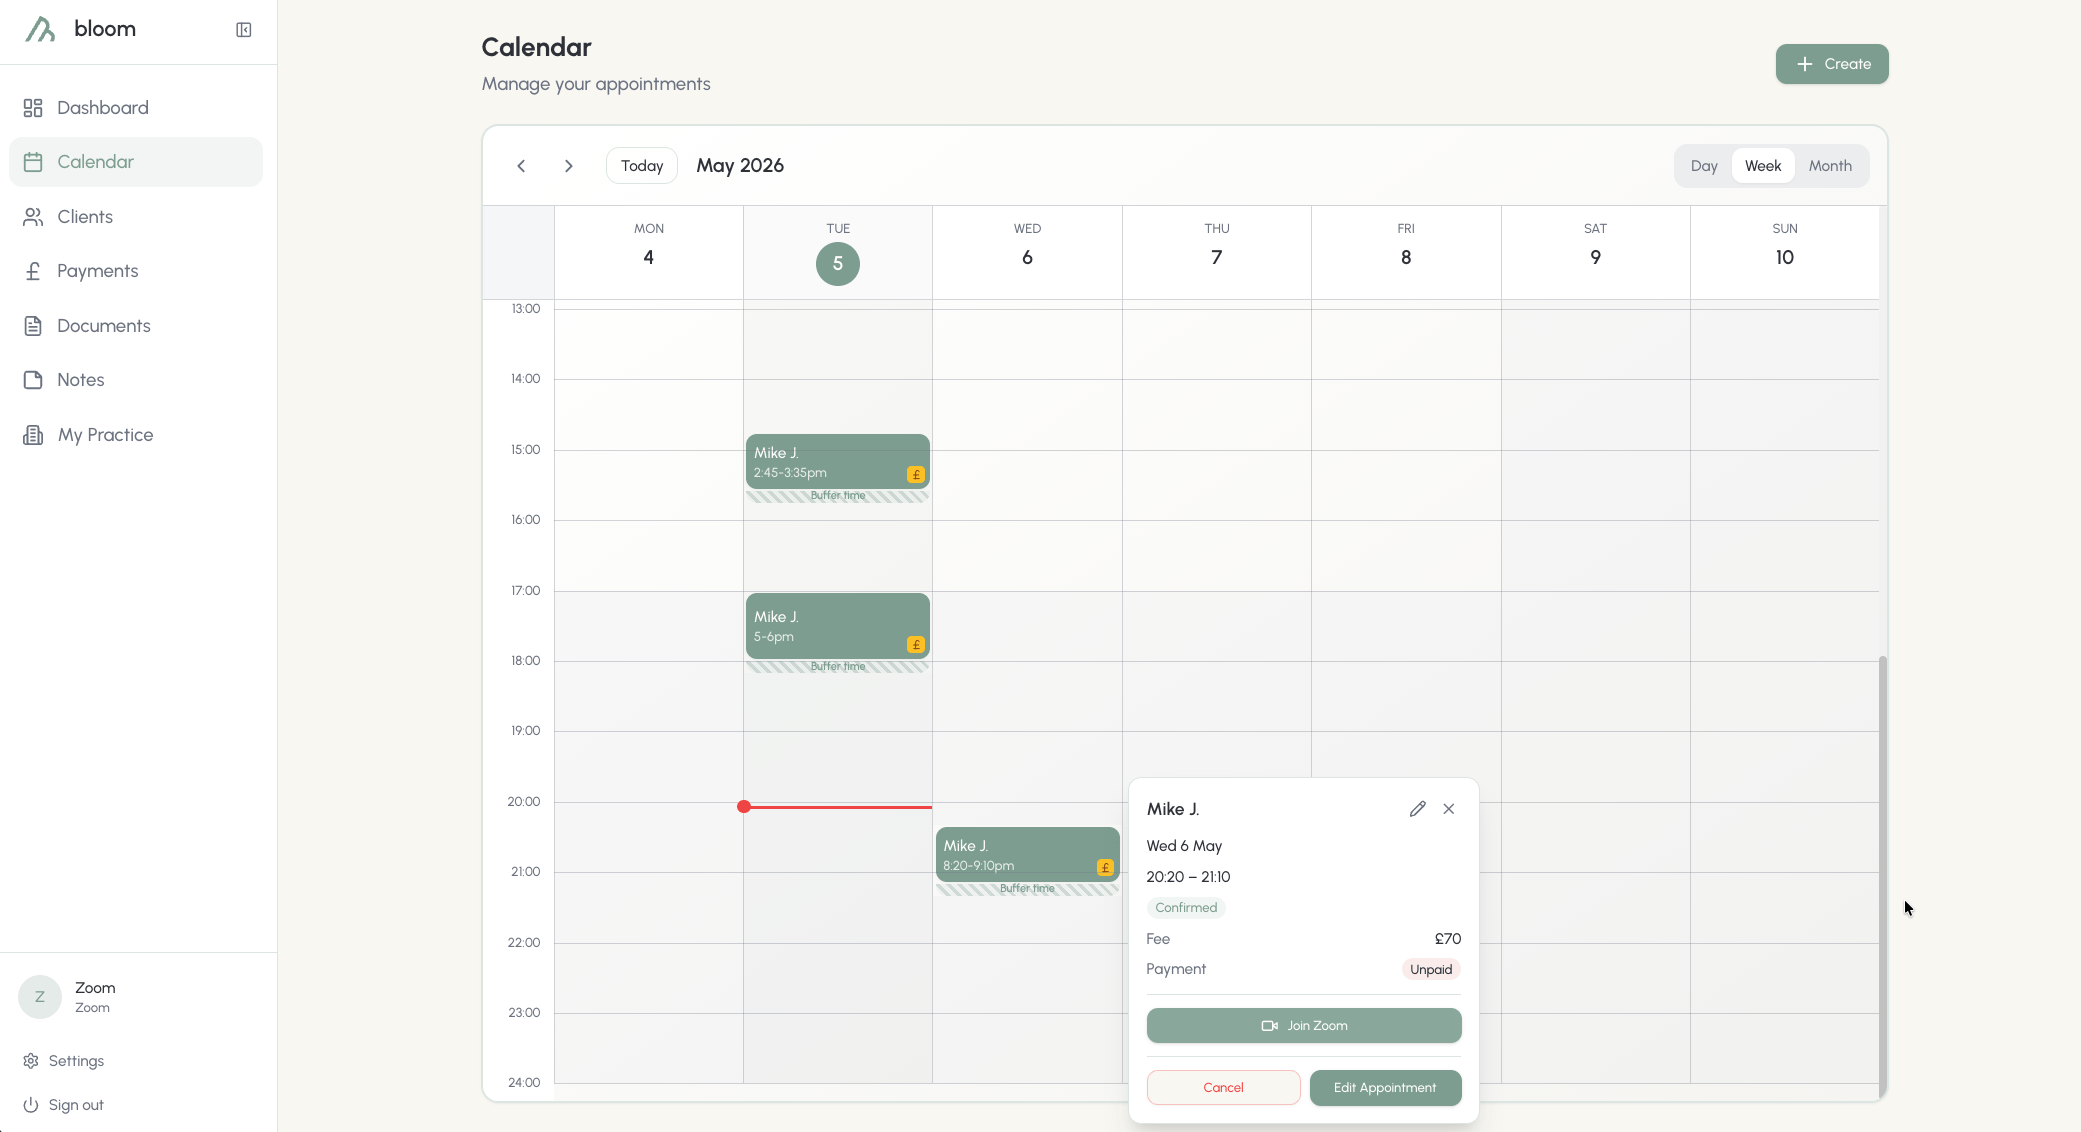
Use case: open the Zoom meeting for a scheduled session, either as the host (you) or as the client. Prerequisites:- A Bloom appointment exists with a Zoom call attached.
- For the therapist: your Zoom account is still connected to Bloom and you’re signed in to Bloom.
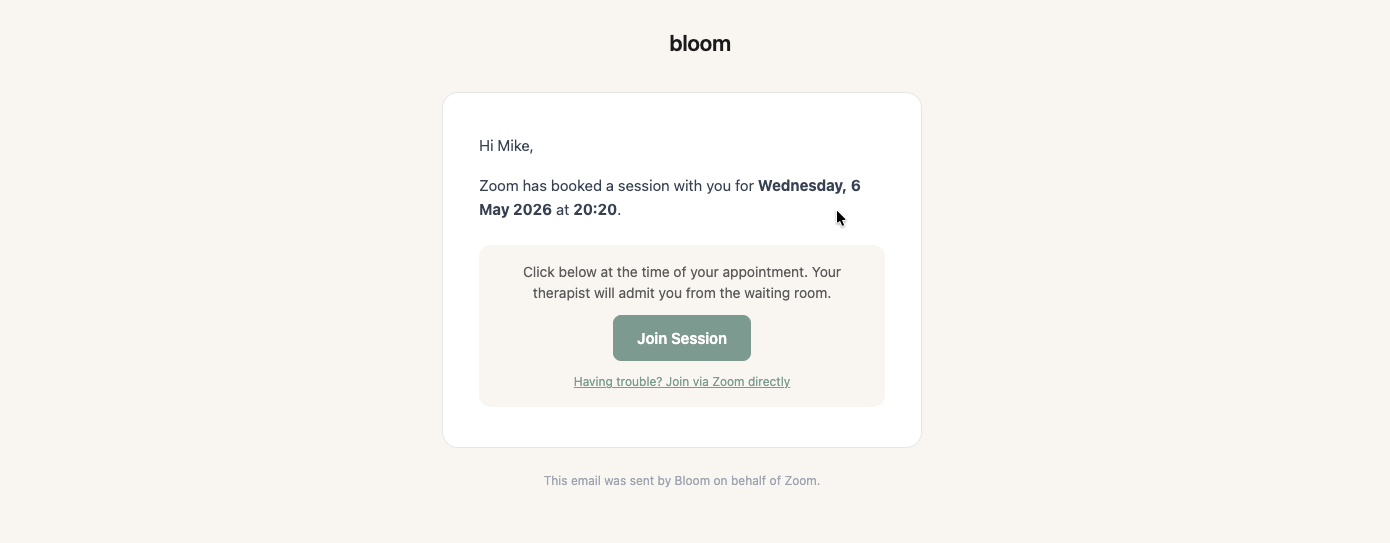
- For the client: they have the confirmation or reminder email containing the join link.
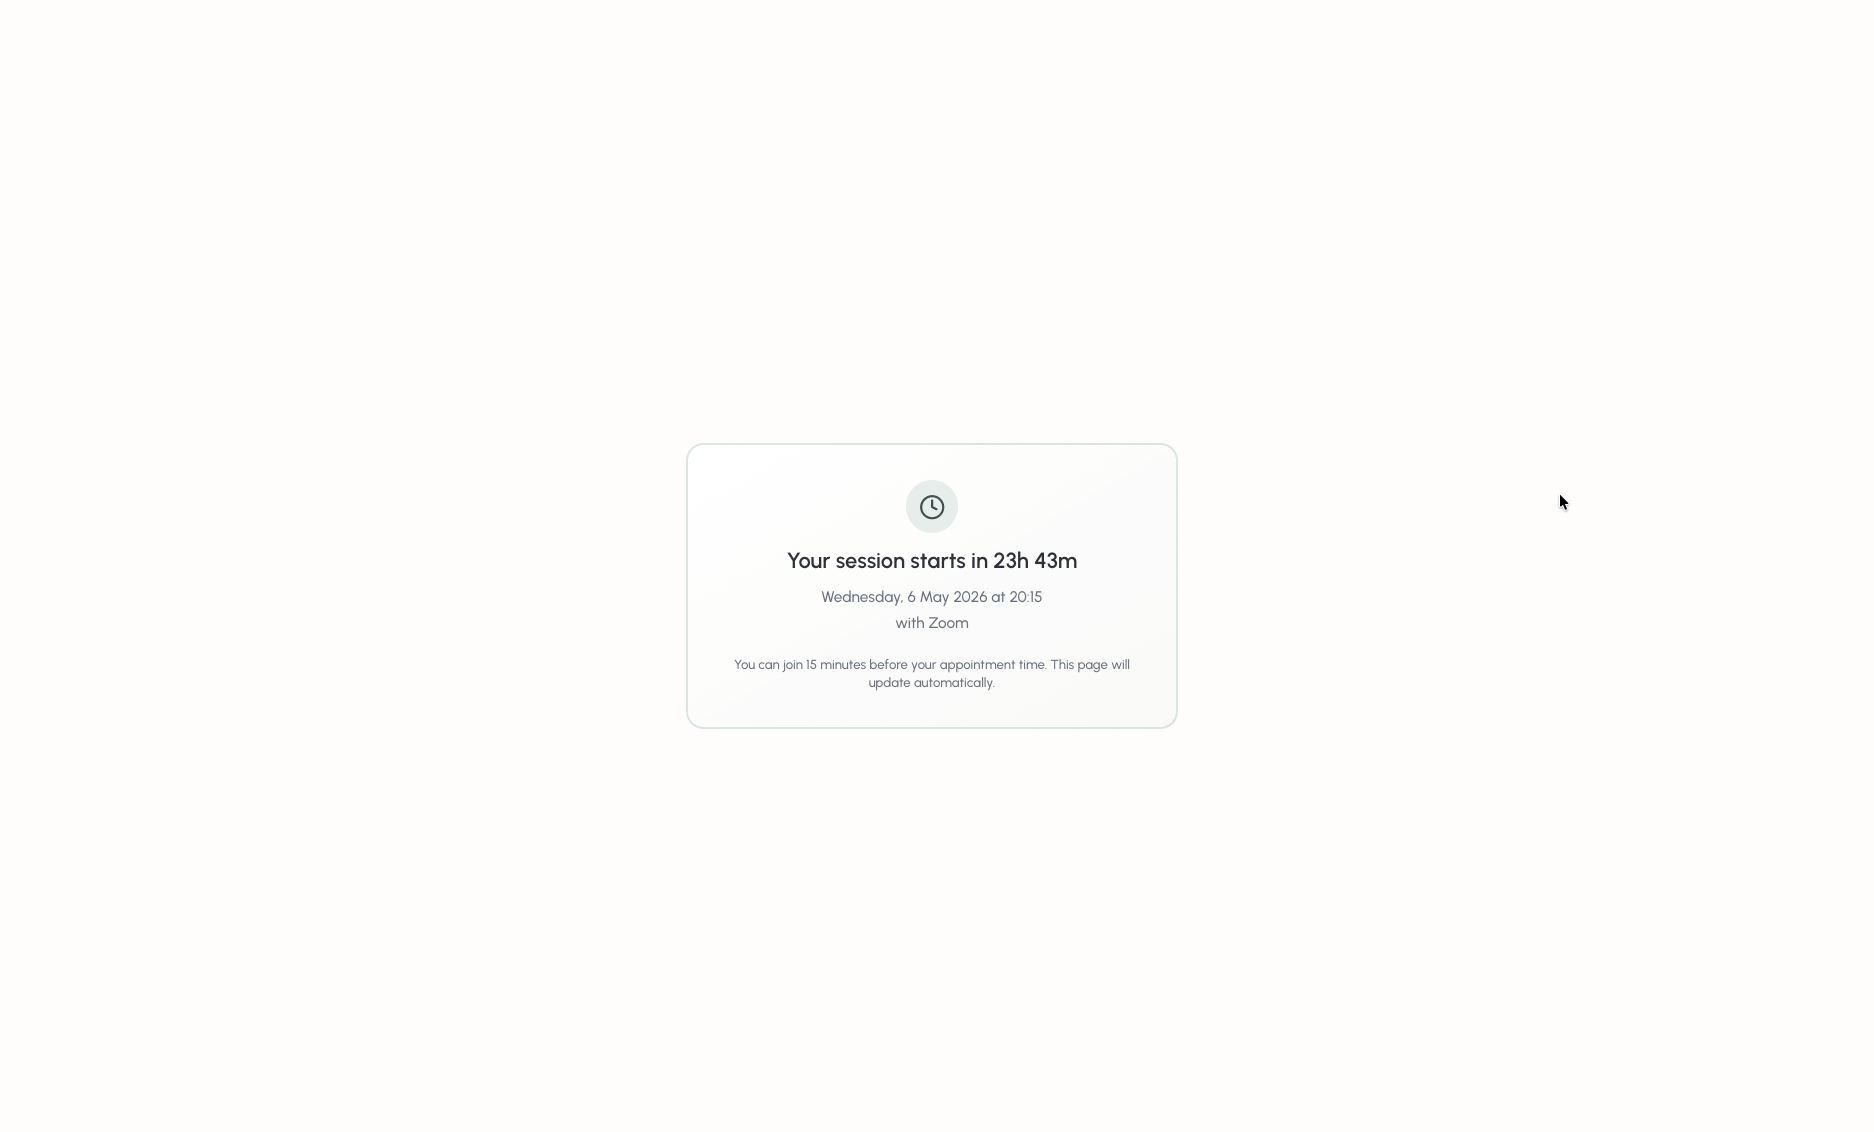
You won’t be able to join the call until the meeting starts. Clients can join up to 15 minutes before the session start time.
Waiting rooms
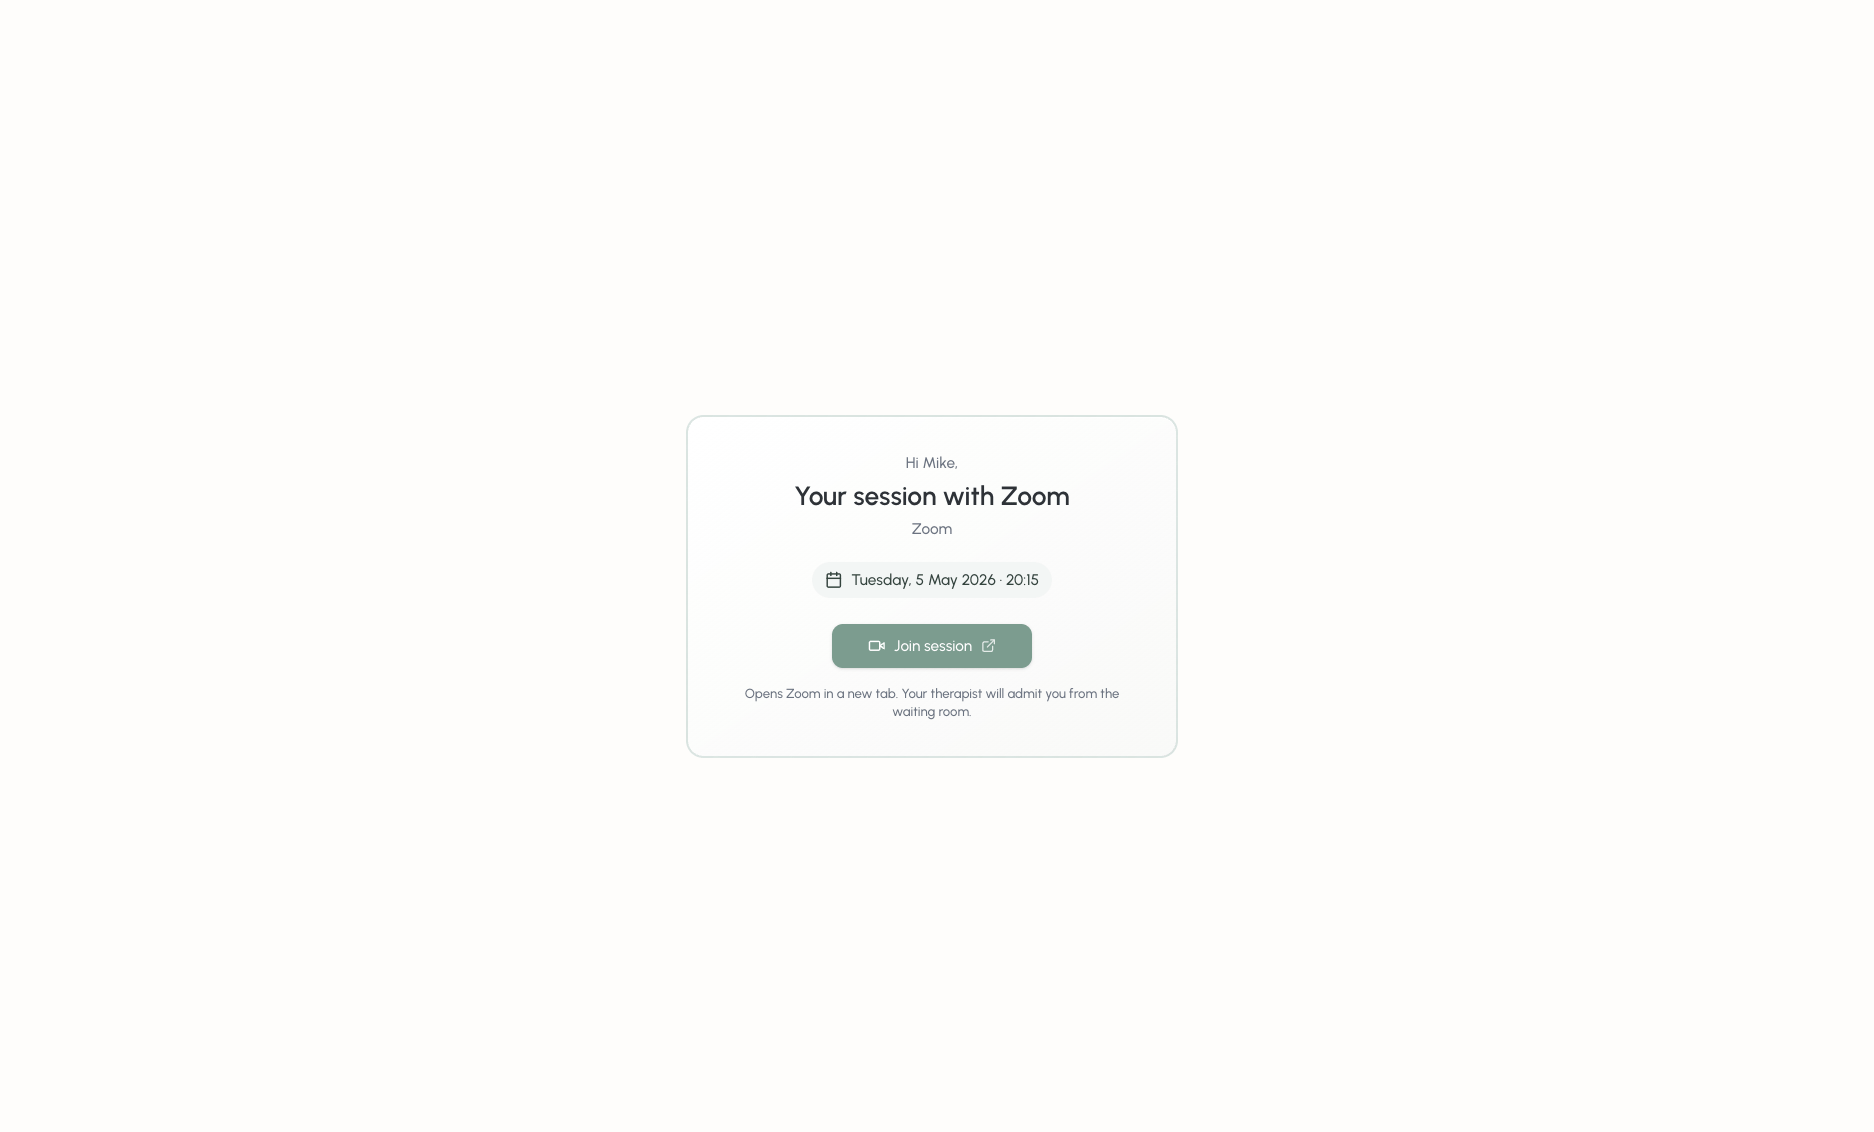
All clients will be admitted to the waiting room before the call starts. You’ll need to admit each client into the call for them to join. No client will be admitted directly into the call.Clients will be allowed to join the meeting room up to 15 minutes before their session.
Rescheduling a Zoom call
Use case: move a Zoom session to a new time without sending the client a fresh meeting link. Prerequisites:- The appointment was originally created with a Zoom call attached.
- Your Zoom account is still connected to Bloom.
Cancelling a Zoom call
Use case: cancel a session and remove the associated Zoom meeting from your Zoom account. Prerequisites:- The appointment was originally created with a Zoom call attached.
- Your Zoom account is still connected to Bloom.
Removing the app
You can remove the Bloom + Zoom integration in two ways. Both have the same effect on your Bloom account; option two also removes Bloom from the list of installed apps inside Zoom.Option 1 - disconnect inside Bloom
- Sign in to Bloom and open Settings → Integrations.
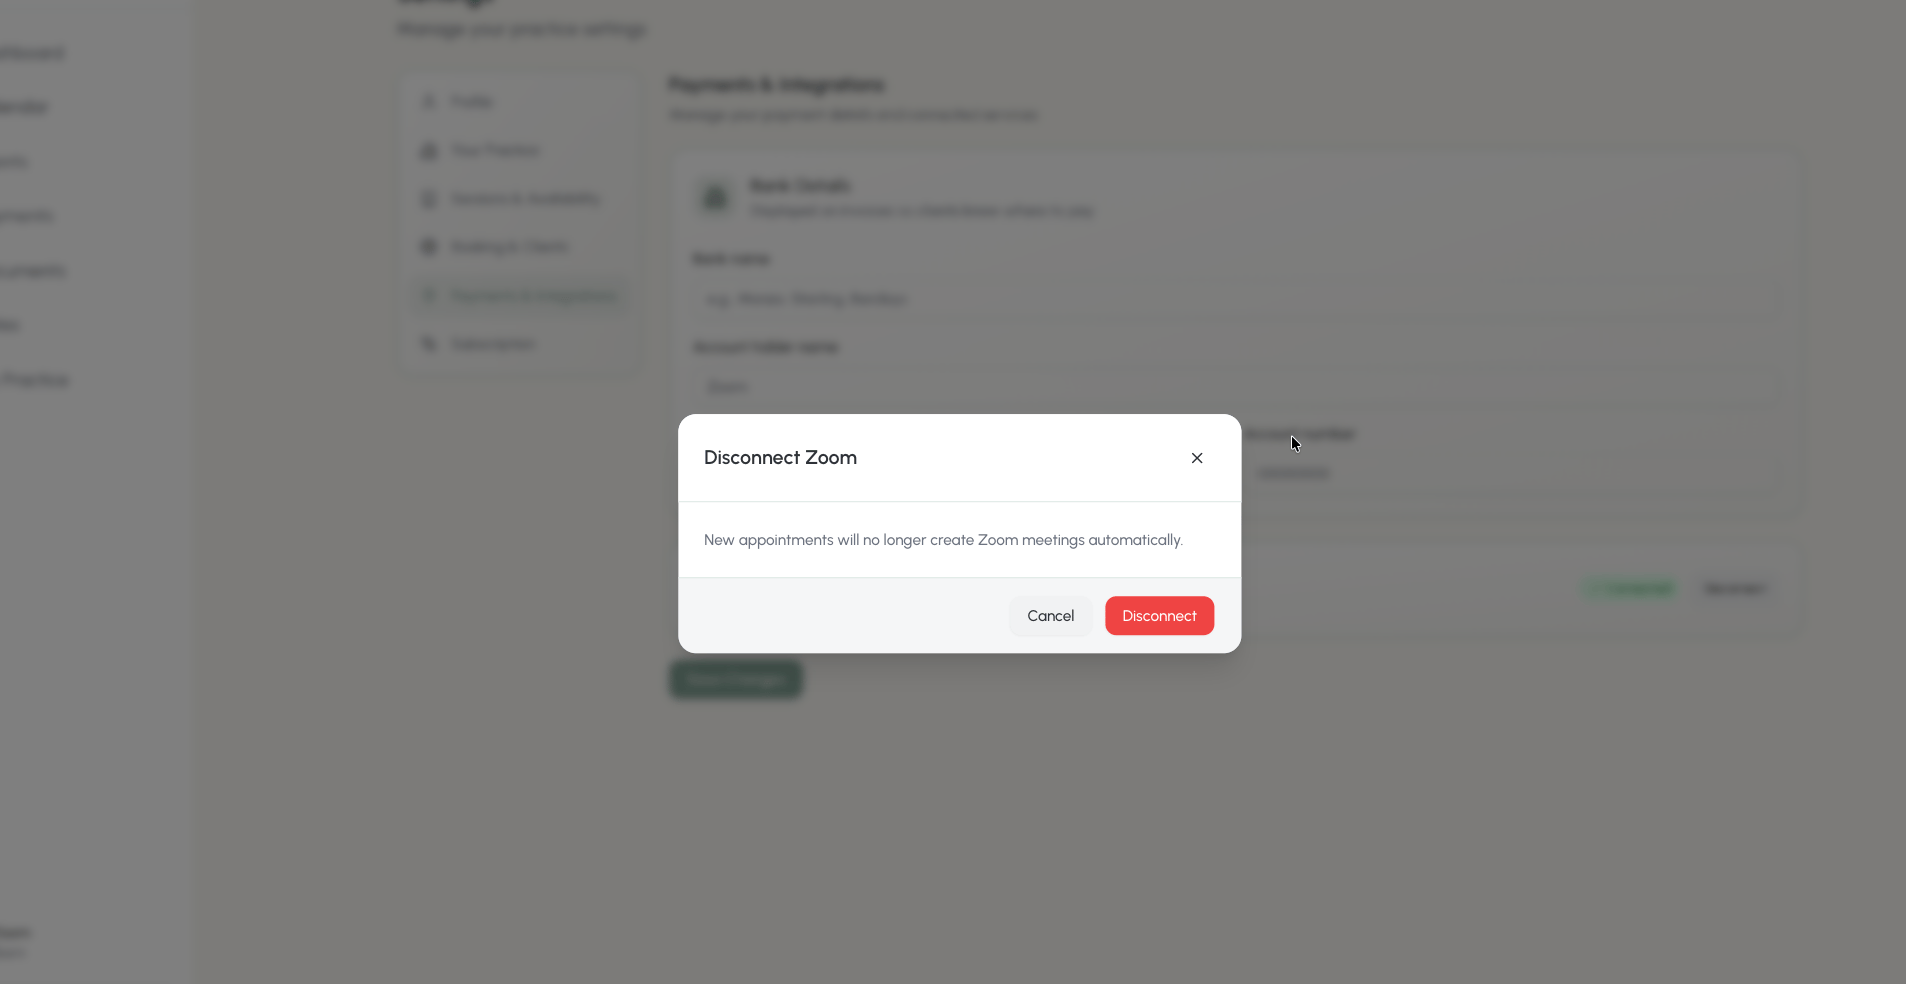
- Find Zoom in the list and click Disconnect.
- Confirm the prompt.
Option 2 - uninstall via the Zoom App Marketplace
- Sign in to your Zoom account at zoom.us.
- Open the Zoom App Marketplace and click Manage → Added Apps (or search for “Bloom”).
- Select the Bloom app.
- Click Remove.
What happens to your data when you remove the app
When you disconnect Zoom from Bloom (either method above), Bloom does the following immediately:- Revokes your Zoom access token with Zoom, so Bloom can no longer act on your behalf.
- Deletes your encrypted Zoom access and refresh tokens from Bloom’s database.
- Clears the connection record linking your Bloom account to your Zoom user id.
Implications of removal
Before you disconnect, please be aware that:- Future appointments will no longer auto-create Zoom calls. The Zoom toggle in the appointment dialog will be unavailable until you reconnect.
- Already-scheduled Zoom calls remain in your Zoom account. Bloom keeps the join link and meeting ID stored against the appointment, so clients who already have the link can still join. If you also want those meetings cancelled, delete them in your Zoom account or cancel the matching appointments in Bloom before disconnecting (while Bloom still has access to remove them from Zoom).
- Rescheduling existing Zoom appointments in Bloom will no longer update Zoom. The Bloom appointment time will change, but the Zoom meeting on your account will keep its original time. We recommend reconnecting Zoom, or updating the Zoom meeting manually, in this case.
- You can reconnect at any time. Reconnecting issues a fresh authorisation; previously-created meetings are not re-linked but new appointments will work as normal.
Troubleshooting
Zoom says “app not pre-approved” or “admin approval required”
Zoom says “app not pre-approved” or “admin approval required”
Your Zoom account is managed by an organisation that requires admin approval for new apps. Ask your Zoom admin to pre-approve Bloom on the Zoom App Marketplace, then try connecting again.
The Zoom toggle is greyed out when I create an appointment
The Zoom toggle is greyed out when I create an appointment
This means Bloom can’t see an active Zoom connection on your account. Open Settings → Integrations and check that Zoom is listed as connected. If it shows Reconnect, click it and finish the Zoom authorisation flow.
I clicked Join Zoom but nothing happened, or I got a “meeting not found” error
I clicked Join Zoom but nothing happened, or I got a “meeting not found” error
The most common cause is that the meeting was deleted in Zoom (manually, or because the Zoom account was disconnected and reconnected). Reschedule the appointment in Bloom with the Zoom toggle on to create a fresh meeting, then notify your client of the new link.
I can't find or access the recording of a session
I can't find or access the recording of a session
Bloom creates every meeting with cloud and local recording disabled by default, so sessions are not recorded unless you turn recording on manually inside the Zoom client during the call. Bloom never accesses, stores, or manages your recordings - any recording you make lives entirely in your own Zoom account. To find a recording you started, sign in to zoom.us and open Recordings, or check the local folder on the device you recorded from. If recording controls are greyed out in Zoom, your Zoom plan or your Zoom admin’s settings may not permit recording - this is a Zoom account setting and isn’t controlled by Bloom.
My client says the link doesn't work or sends them to the wrong meeting
My client says the link doesn't work or sends them to the wrong meeting
Ask the client to use the link from the most recent confirmation or reminder email. If they’re using a calendar entry they created themselves, the link there may be stale - the link in their Bloom-sent email is always the current one.
I disconnected Zoom by mistake
I disconnected Zoom by mistake
Just reconnect from Settings → Integrations. New appointments will get Zoom calls again immediately. Existing appointments keep their original join links, so your clients aren’t affected.
FAQ
Do I need a paid Zoom account?
Do I need a paid Zoom account?
Not necessarily. Free Zoom accounts work fine for sessions under 40 minutes with up to 100 participants. For longer sessions you’ll need a Zoom paid plan. Bloom doesn’t change any limit Zoom applies to your account.
Are sessions recorded?
Are sessions recorded?
No. Bloom creates meetings with cloud and local recording disabled. If you want to record a session, enable recording manually inside the Zoom client during the call (and make sure your client consents).
Where are my Zoom tokens stored?
Where are my Zoom tokens stored?
Bloom encrypts both the access and refresh tokens at rest using AES-256-GCM before storing them. They’re only decrypted in-memory when Bloom needs to call the Zoom API on your behalf.
Will my clients need a Zoom account?
Will my clients need a Zoom account?
No. Your clients can join from any browser using the link in their email. They don’t need to create a Zoom account.
Can I use Bloom's Zoom integration with my existing Zoom calendar entries?
Can I use Bloom's Zoom integration with my existing Zoom calendar entries?
Bloom only manages meetings it creates itself. Meetings you scheduled directly in Zoom won’t appear in Bloom.
Contact support
If you need help with the Zoom integration, the Bloom support team is happy to assist.- Contact form: trybloom.co.uk/contact
- Email: hello@trybloom.co.uk
- Hours: Monday to Friday, 9am - 5pm UK time
- First response: within one working day
- The email address on your Bloom account.
- A description of what you were trying to do.
- Any error message that appeared, and a screenshot if possible.
Contact Bloom support
Open the Bloom contact form